Category: Uncategorized

  • New Product! Caps to top off your garden bed

    From time to time I’ve made garden beds with caps on them that give the bed a finished look and provide a place to sit. Many people have asked for them but I did not have a good way to offer the add-on as a kit that would be easy for anyone to install. I am excited to say that I have worked out a good system and am offering a cap for sale!

    Here are photos of caps on a friend’s bed (a custom 3′ width):

    Caps on a pair of 3-foot-wide beds.
    Caps on a pair of 3-foot-wide beds.
    Detail of cap. Secured with stainless steel finish-head screws.
    Detail of cap. Secured with stainless steel finish-head screws.

  • Replacement parts

    Our western red cedar lasts a long time but nothing is forever. One of the nice things about our design is that individual pieces can be removed and replaced. Today I am introducing a partial warranty and replacement part policy. If you purchased a bed from Bountiful Boxes in the previous three years — this year, that’s 2012, 2013 or 2014 — and have found a part not holding up well, please let me know and I will give you a replacement part at no charge. If your bed is older than that, I am offering replacement pieces for the lifetime of your bed at a near-cost price.

    For details, please see our replacement parts page.


  • Bounty from boxes

    After a long winter, it’s inspiring to look at garden pictures from last year. 2014 was a good summer for gardening. Please send in your pictures!

    019 beans and beetsIMG_4474139 IMG_4522 IMG_4830 IMG_4835


  • DIY gardener does great work

    Reader Brad Graham kindly send photos of the beds he made using Bountiful Boxes instructions.
    Reader Brad Graham kindly send photos of the beds he made using Bountiful Boxes instructions.

    On our DIY page, I offer instructions for how to make a Bountiful Boxes kit yourself instead of paying me to do it. The only payment I ask in return is photos of your garden to show off.

    Reader Brad Graham took up the challenge in fall 2014, and from the looks of it did a terrific job. He wrote:

    The instructions were clear and everything went swimmingly. 
    I lived in Princeton for a year and would frequent the Whole 
    Earth Center, which is how I was familiar with your site. We 
    just moved to Ardmore, PA (just outside of Philadelphia) and 
    one of my first goals was to put in some gardening space. 
    I'm really excited for the spring time so I can get my hands 
    dirty. Hopefully we don't have another winter like last 
    year. The township I live in offers free leaf compost for 
    residents, which I've used to fill the beds. It took around 
    eight trash cans (8*32=256 gallons) per bed. 
    
    I planted some fall garlic bulbs back in mid-October, but 
    with this warm weather I'm starting to see a few sprouts, 
    just have to plant them later next year. My next step is to 
    gather some leaves, shred them up, and mulch the beds.
    DIY in action
    Our do-it-yourself instructions even include a printout to lay over the end of the board to show where to drill the holes! Here’s Brad Graham’s setup as he used our instructions.

  • Big-sky chives

    Chives!Chives are a beautiful perennial to have in a raised garden bed. Ours were blooming gloriously the other day.

    At the bottom of the picture, you can see a rascally sprig of mint photobombing the picture. Really, that’s mint’s approach to the whole garden – once it’s in there it pops up everywhere. Beware of putting mint in your raised bed!


  • Peas are on their way

    Pea Sprouts 2014The peas have sprouted, the lettuce is up and apple trees are blooming — all so welcome.

    The peas should be ready to pick by early June.


    Apple BlossomsThese apples – Arkansas Black – are late season, producing beautiful dark-skinned fruit that’s ready to pick in October.

    So these early spring harbingers actually book-end the season.


  • Celebrating a season

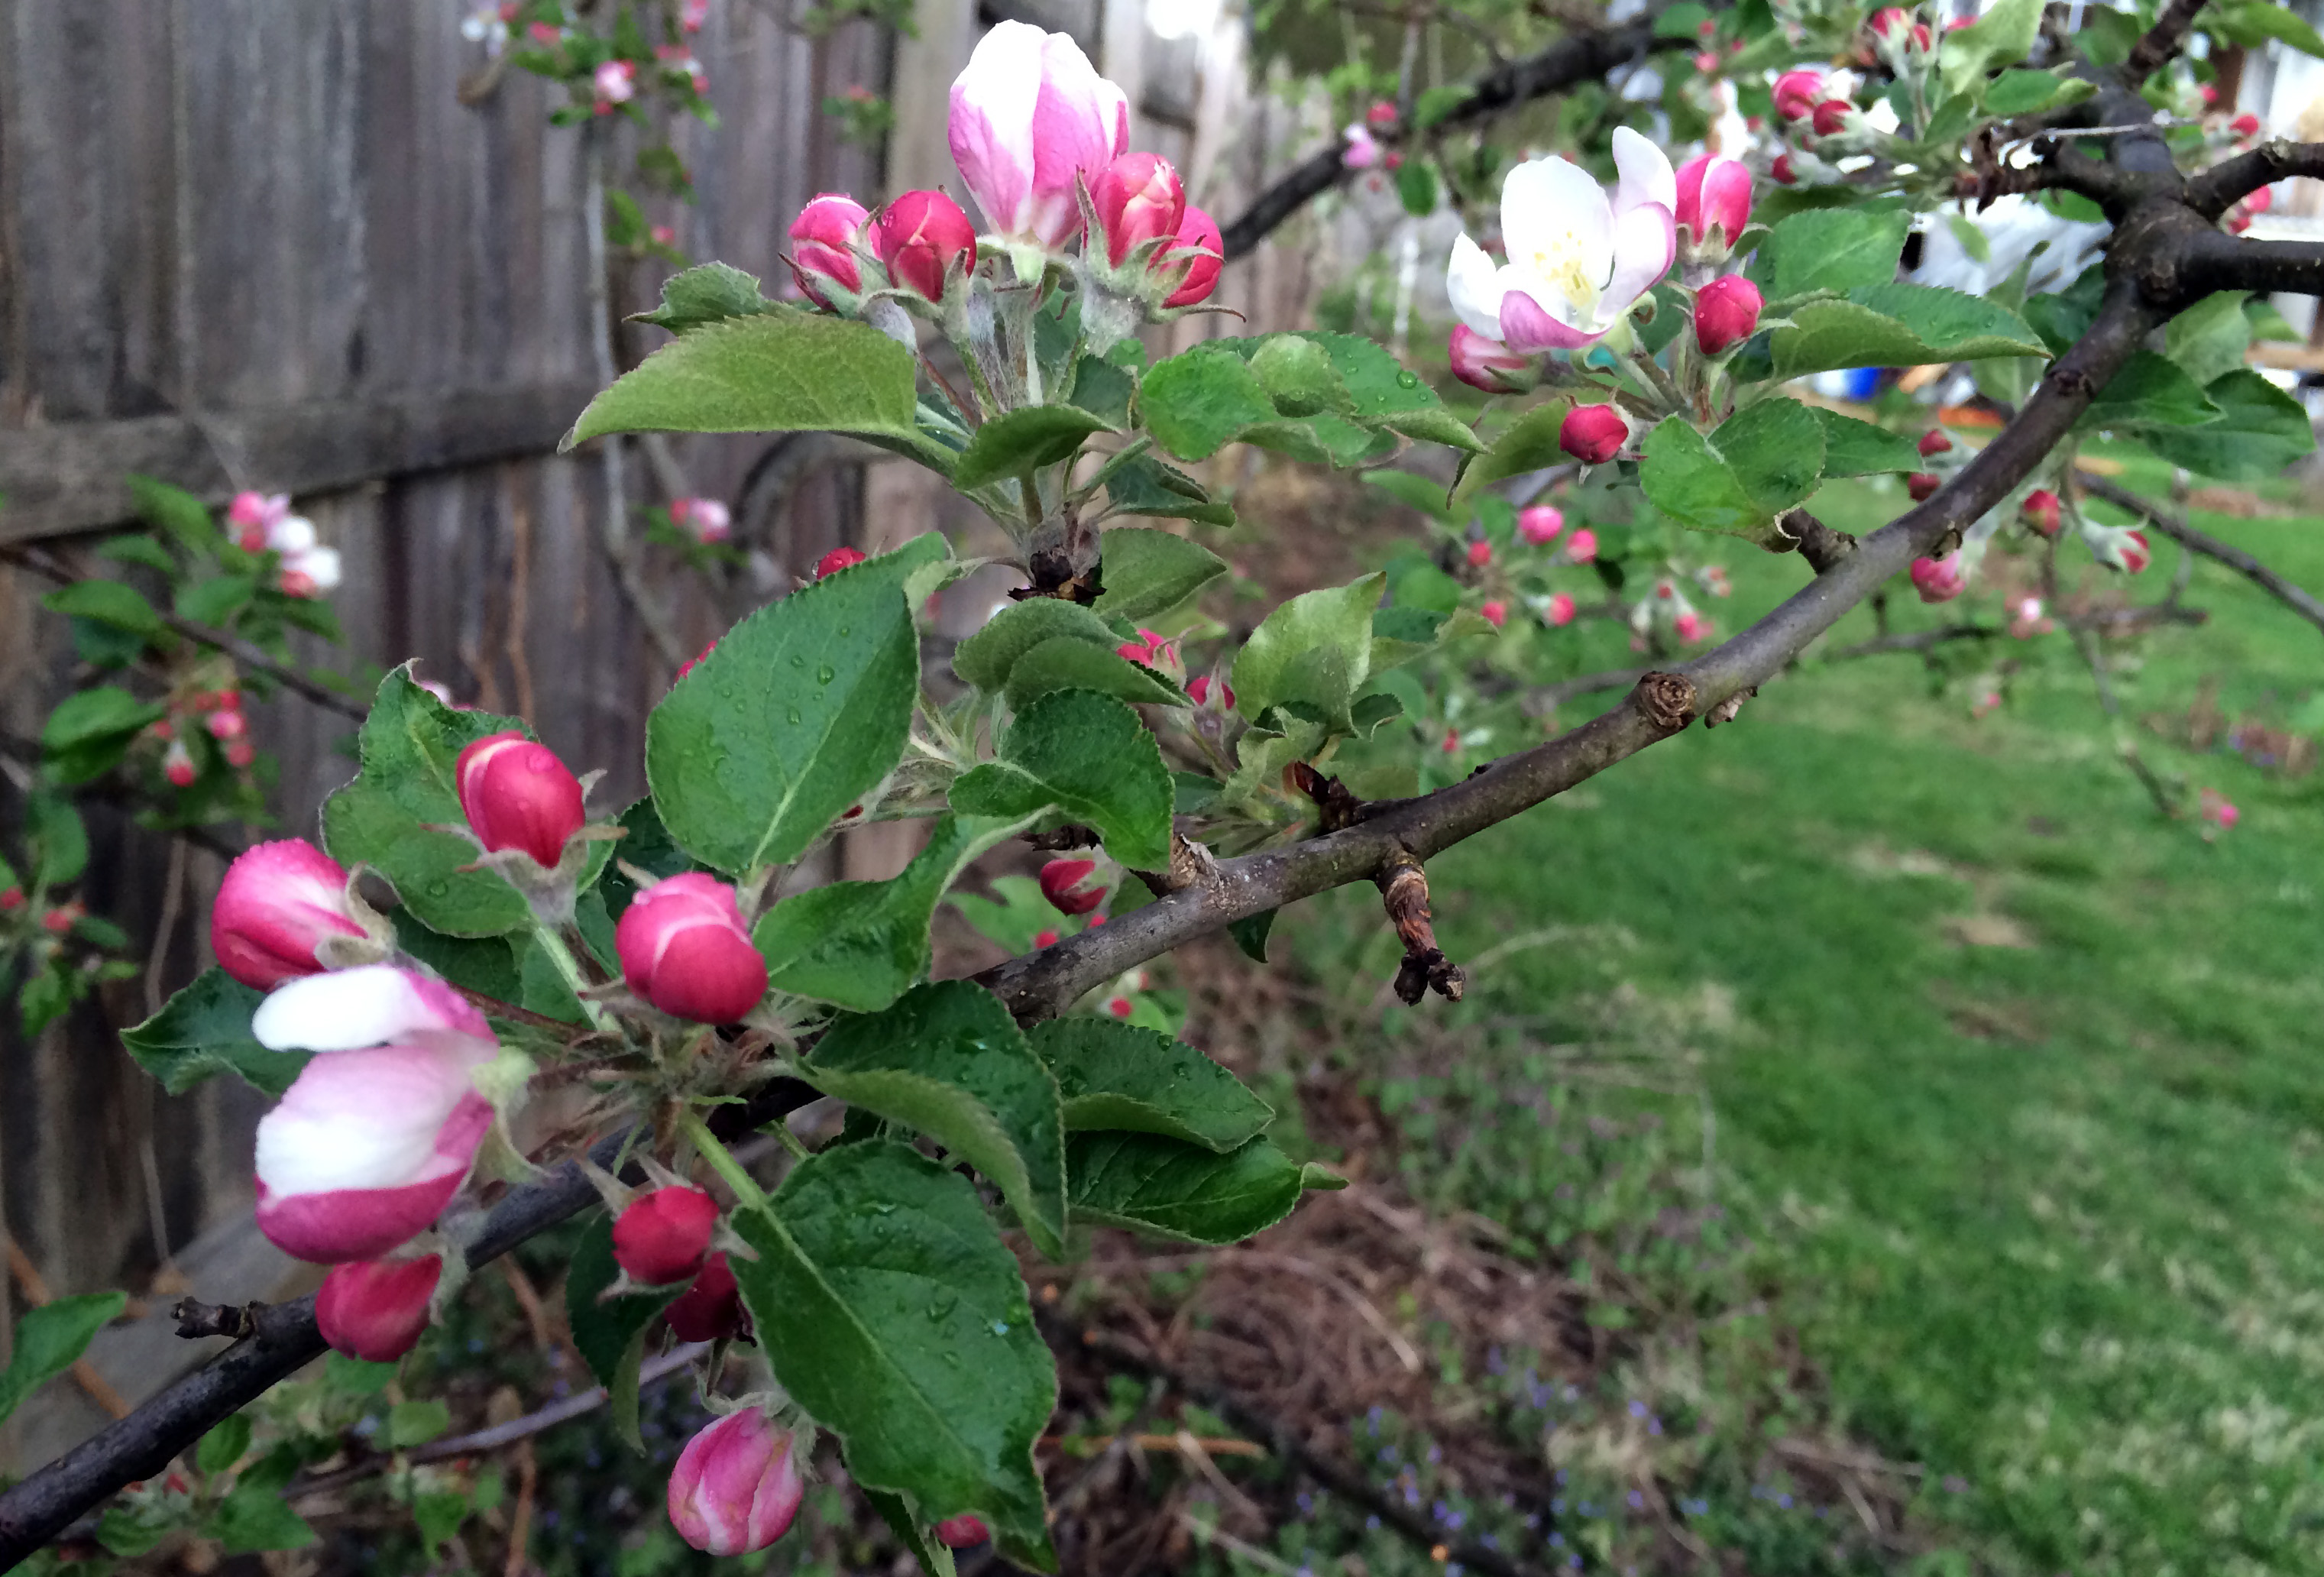
    I am pining for peas. Only two weeks on the calendar until the traditional pea planting day of March 17. But as I look out over the graying expanse of snow and ice that blocks the few modestly warm days from loosening winter’s grip on the hard-frozen ground, the feel of a pea seed sliding into dirt under gentle pressure from my thumb seems remote. Harder still to conjure that snap as the first snow pea of the season breaks free of the vine, still dewy wet in the early morning sun, and the sweet grassy juicy crunch of the first bite…

    I ought to be planning my season of working in the garden and building raised beds but I need extra inspiration. What did it look like when snow did not blanket the beds? Let’s walk through some pictures from 2013.

    Collards after ChristmasJust to remind myself of inevitable transitions, I’ll go back more than a full year, to January 1, 2013, when we harvested collard greens that were overwintering nicely – a bowl chiffonaded and ready to turn into our traditional New Year’s Day supper of black-eyed peas and collard greens.

    Collards seem to sweeten after a frost. Even without a protective cover, such as a cold frame, they seem to bounce right back and are ready for harvest any time the temperature exceeds freezing.

    Collards keep on going past the winter into the new season, but don’t forget to plan new ones. Here are some tiny collards on their way in — I took this photo at the Whole Earth Center demonstration bed on March 30, 2013:

    First peas 2013 at WEC
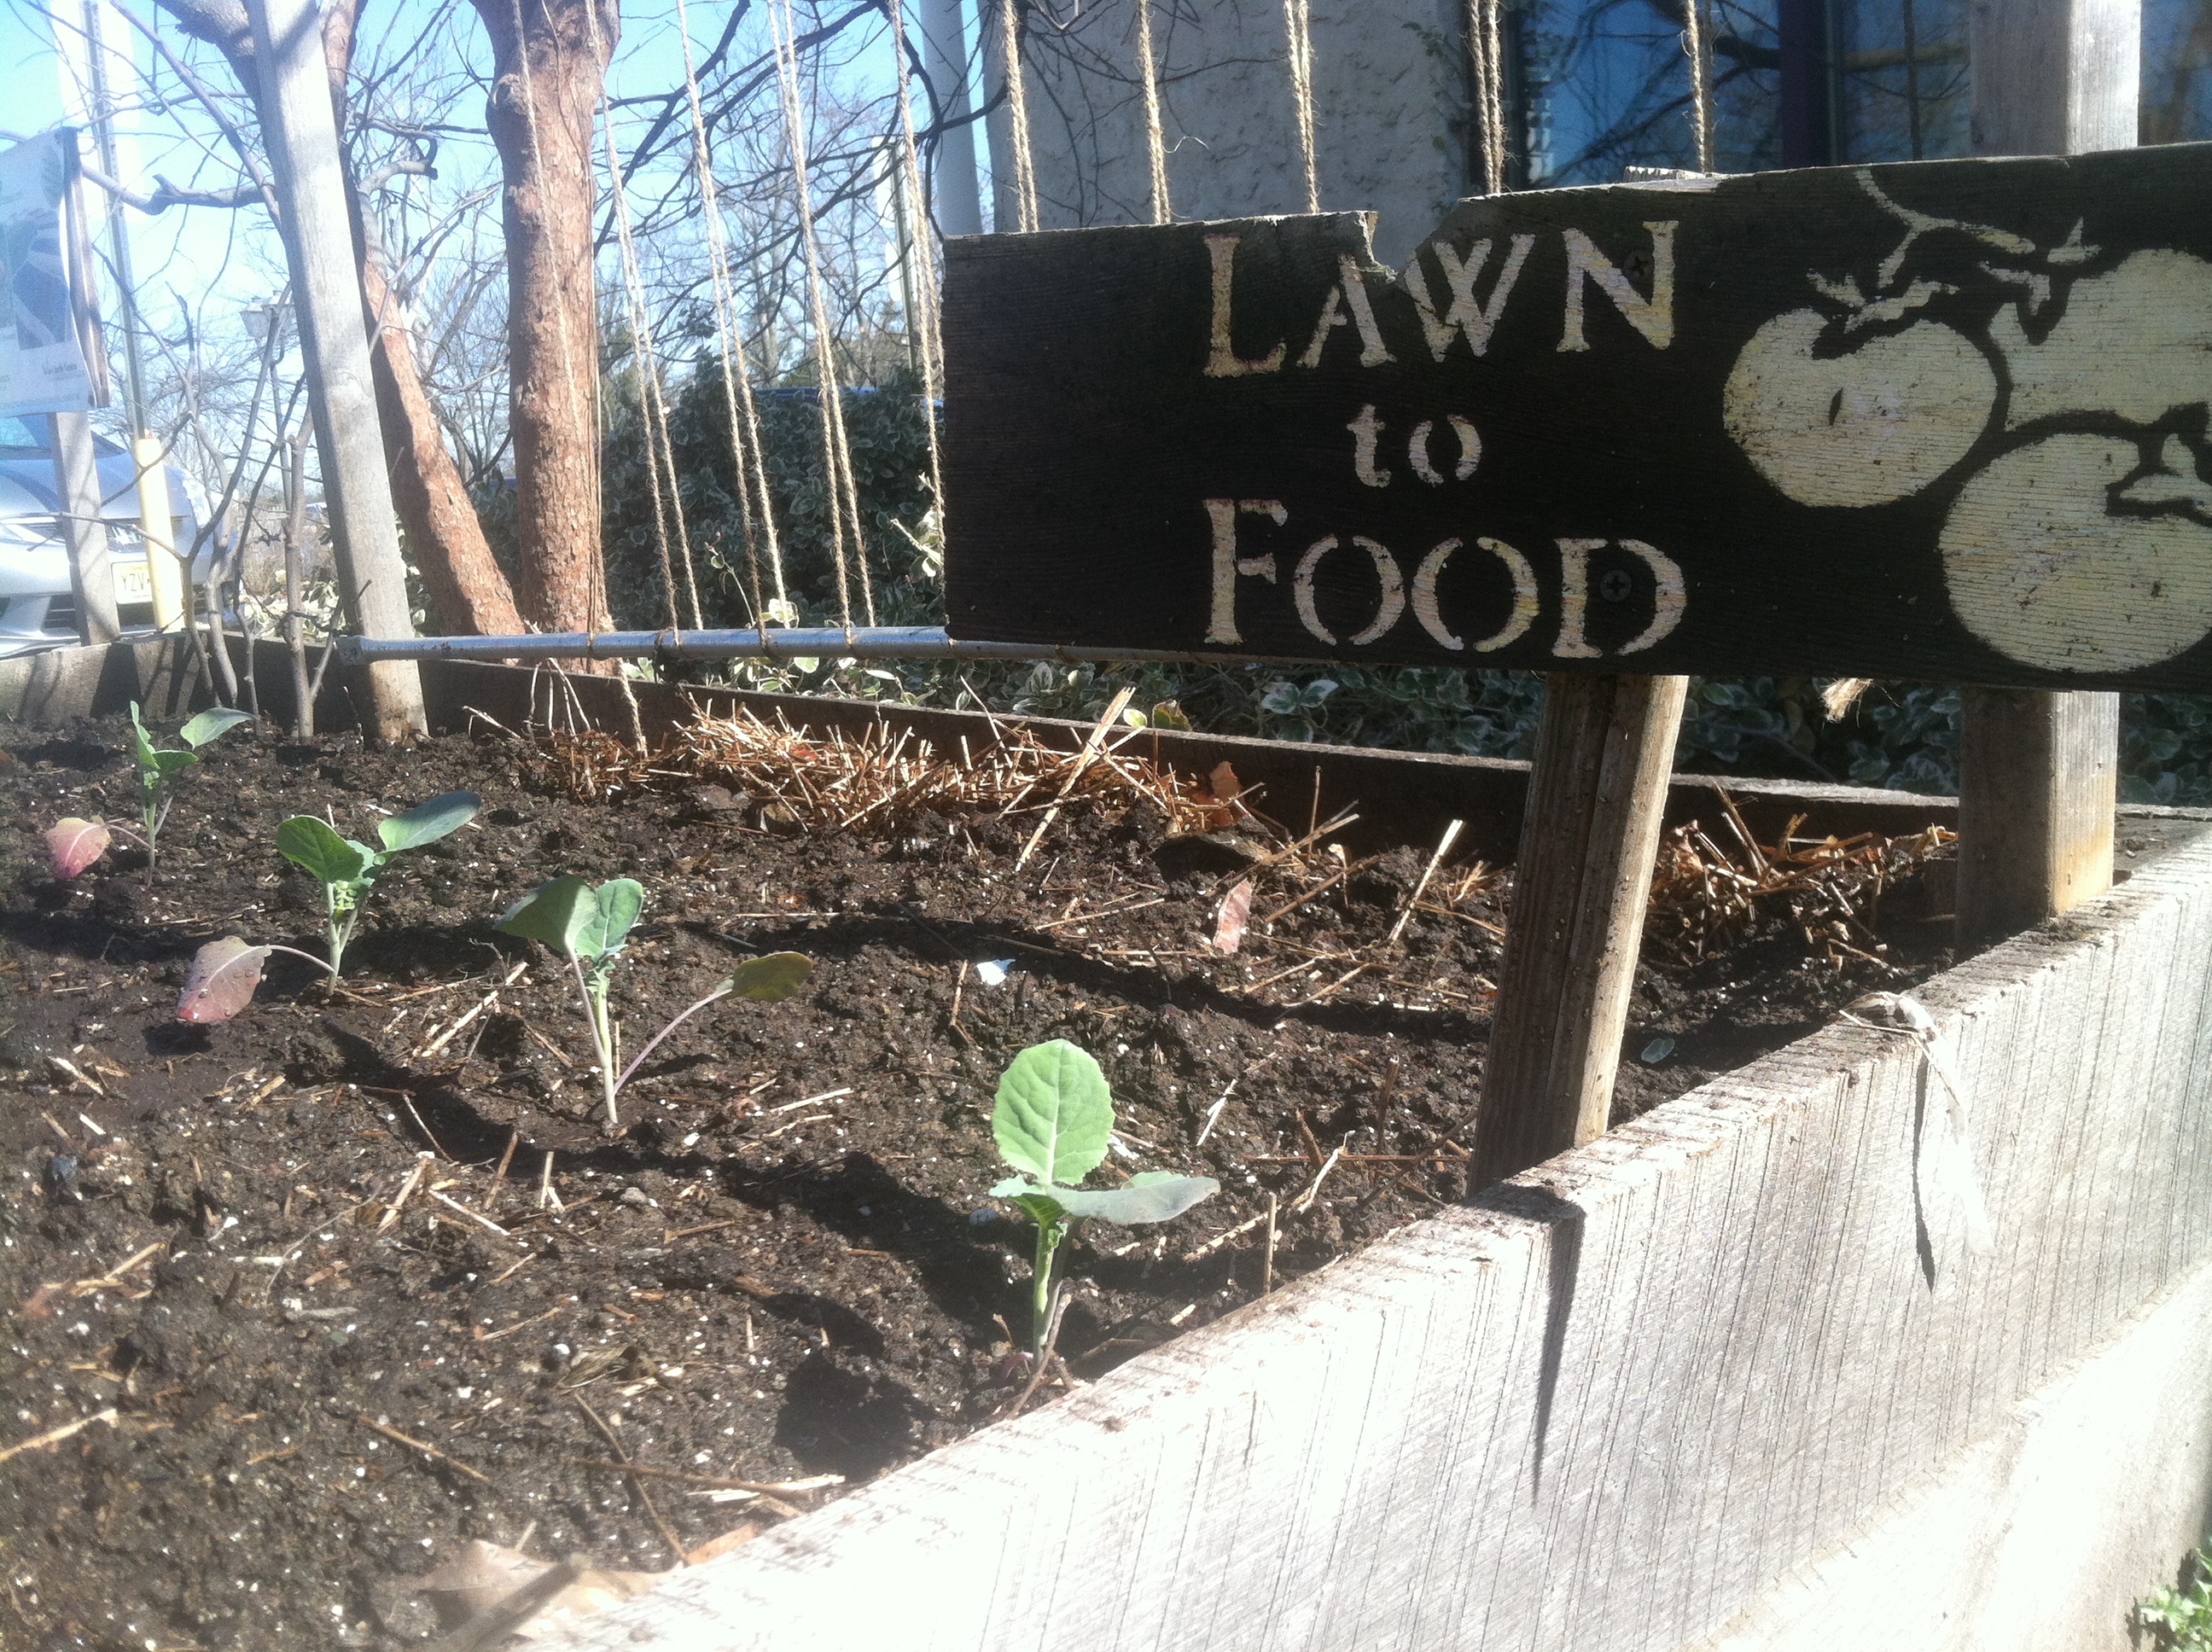
But what about the peas? The trellis is all set there in the back, but nothing’s coming up yet….

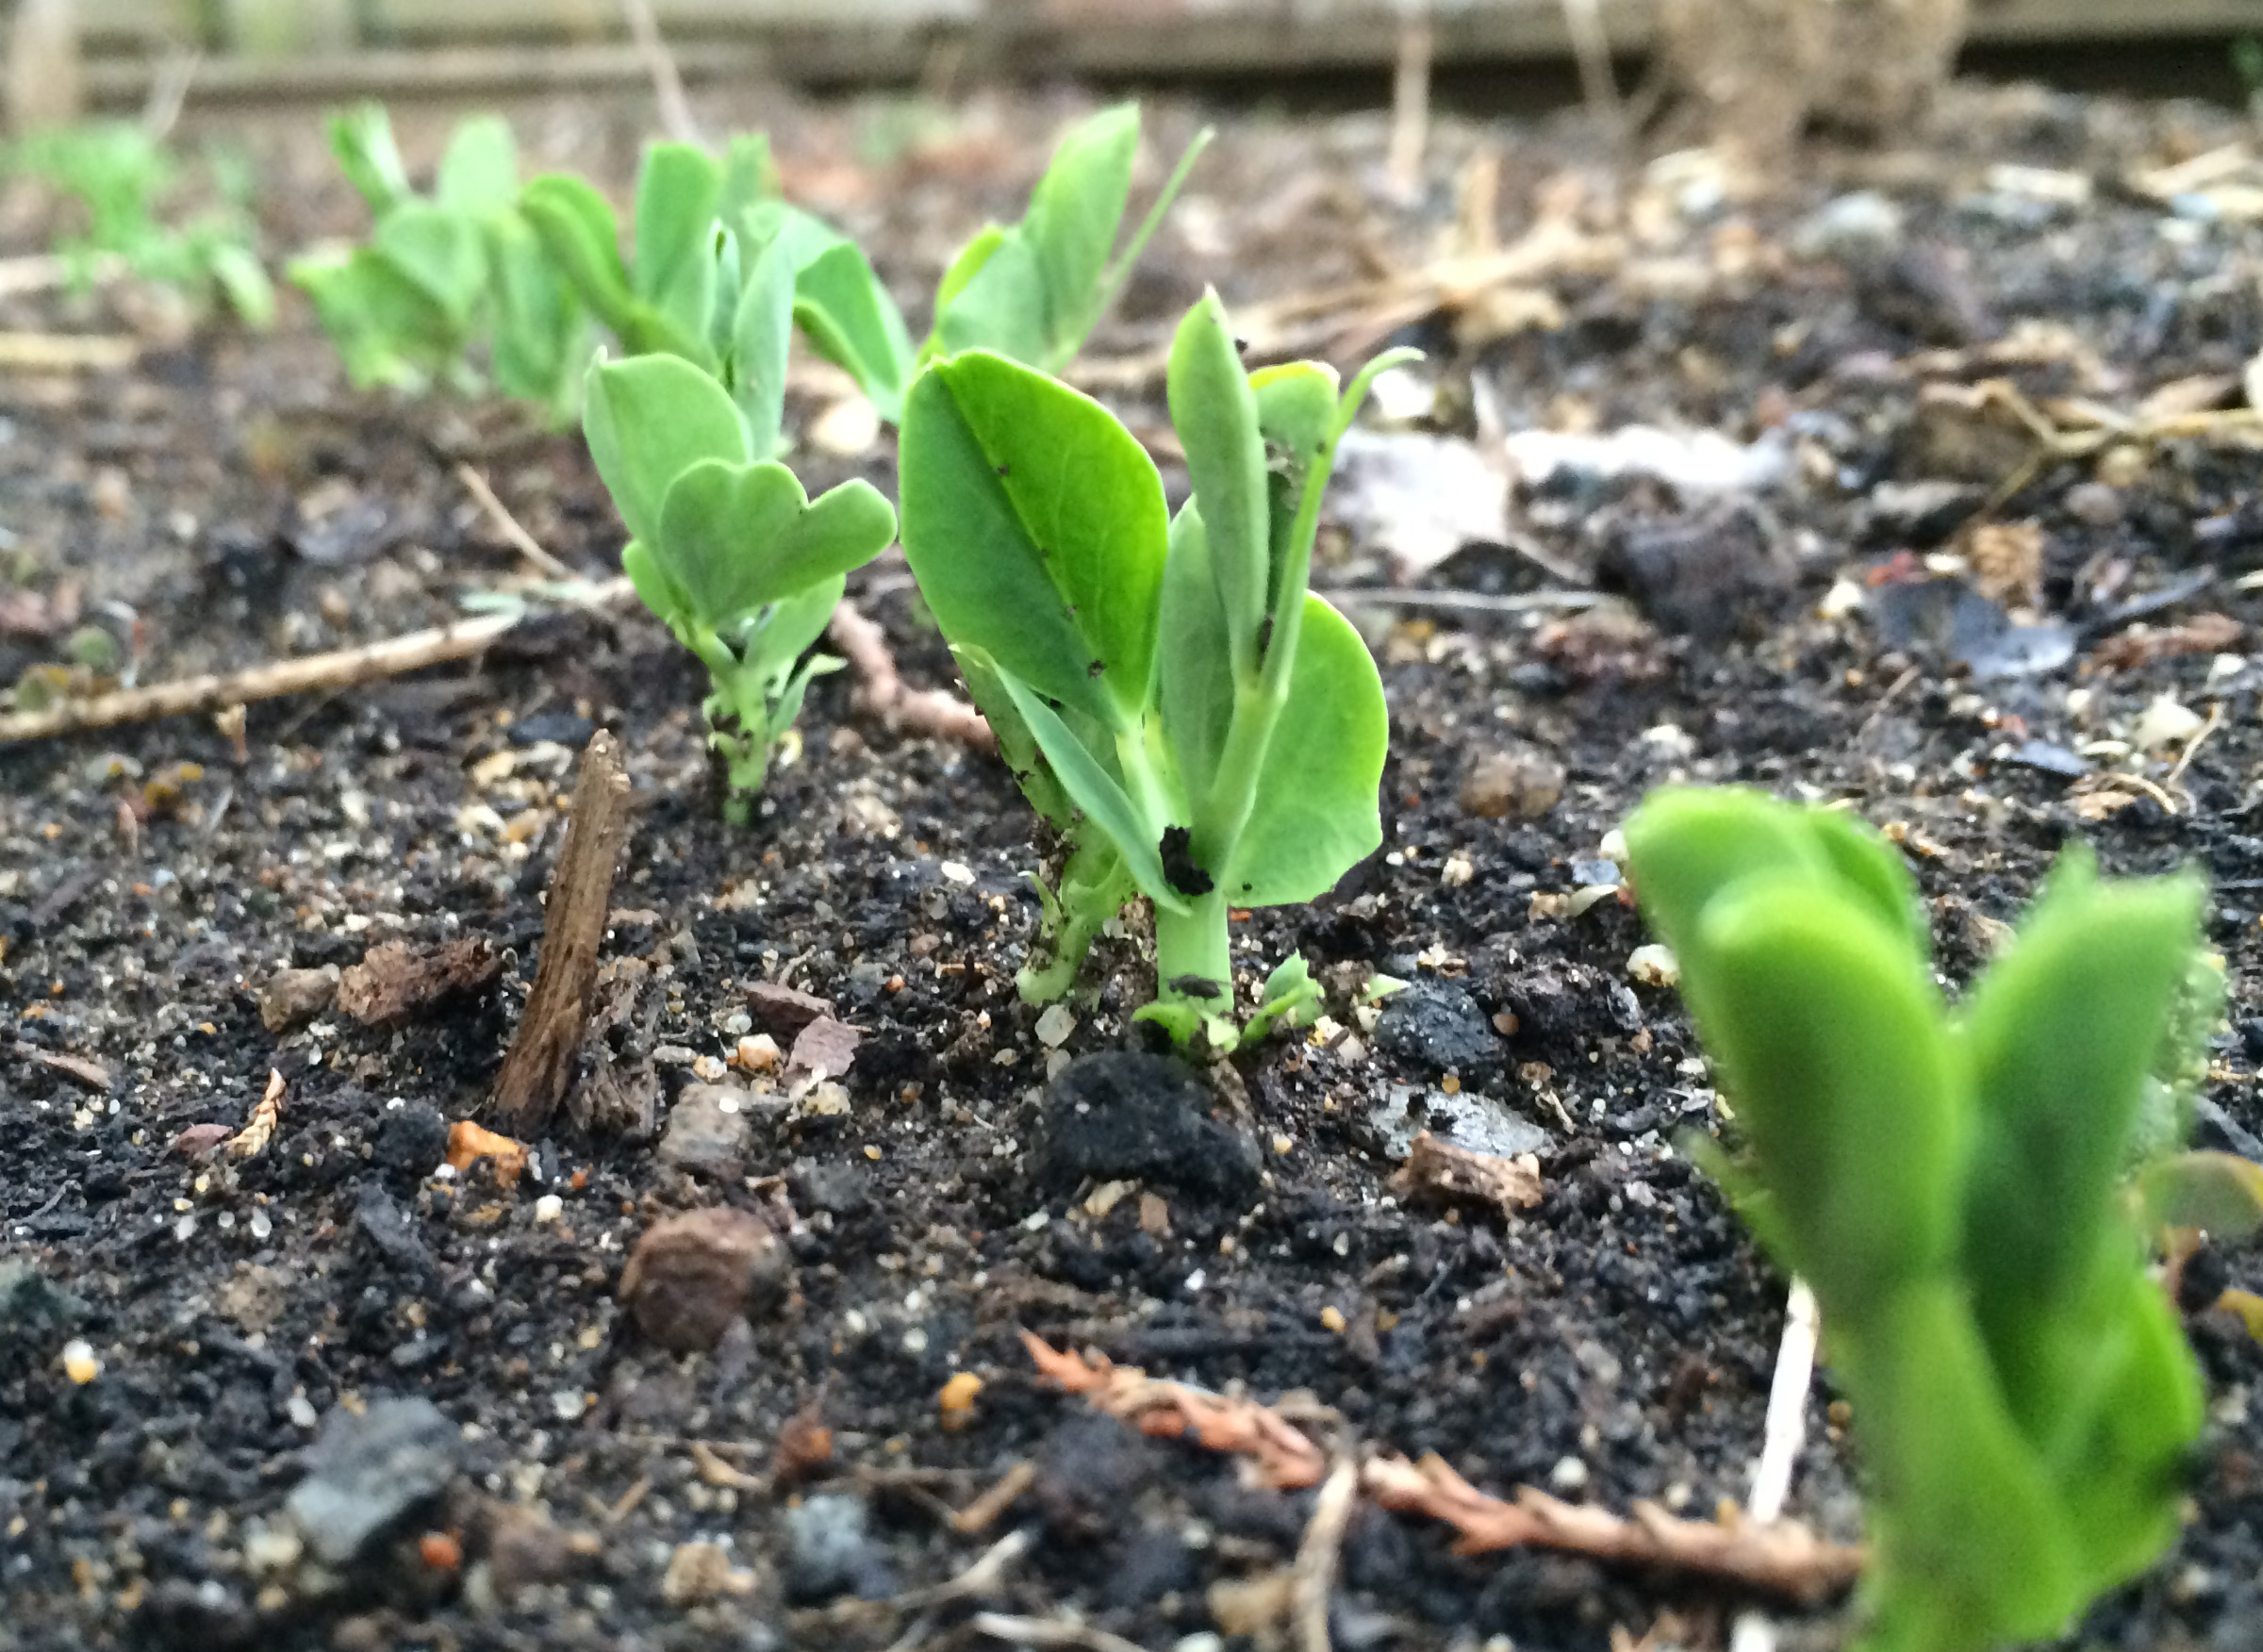
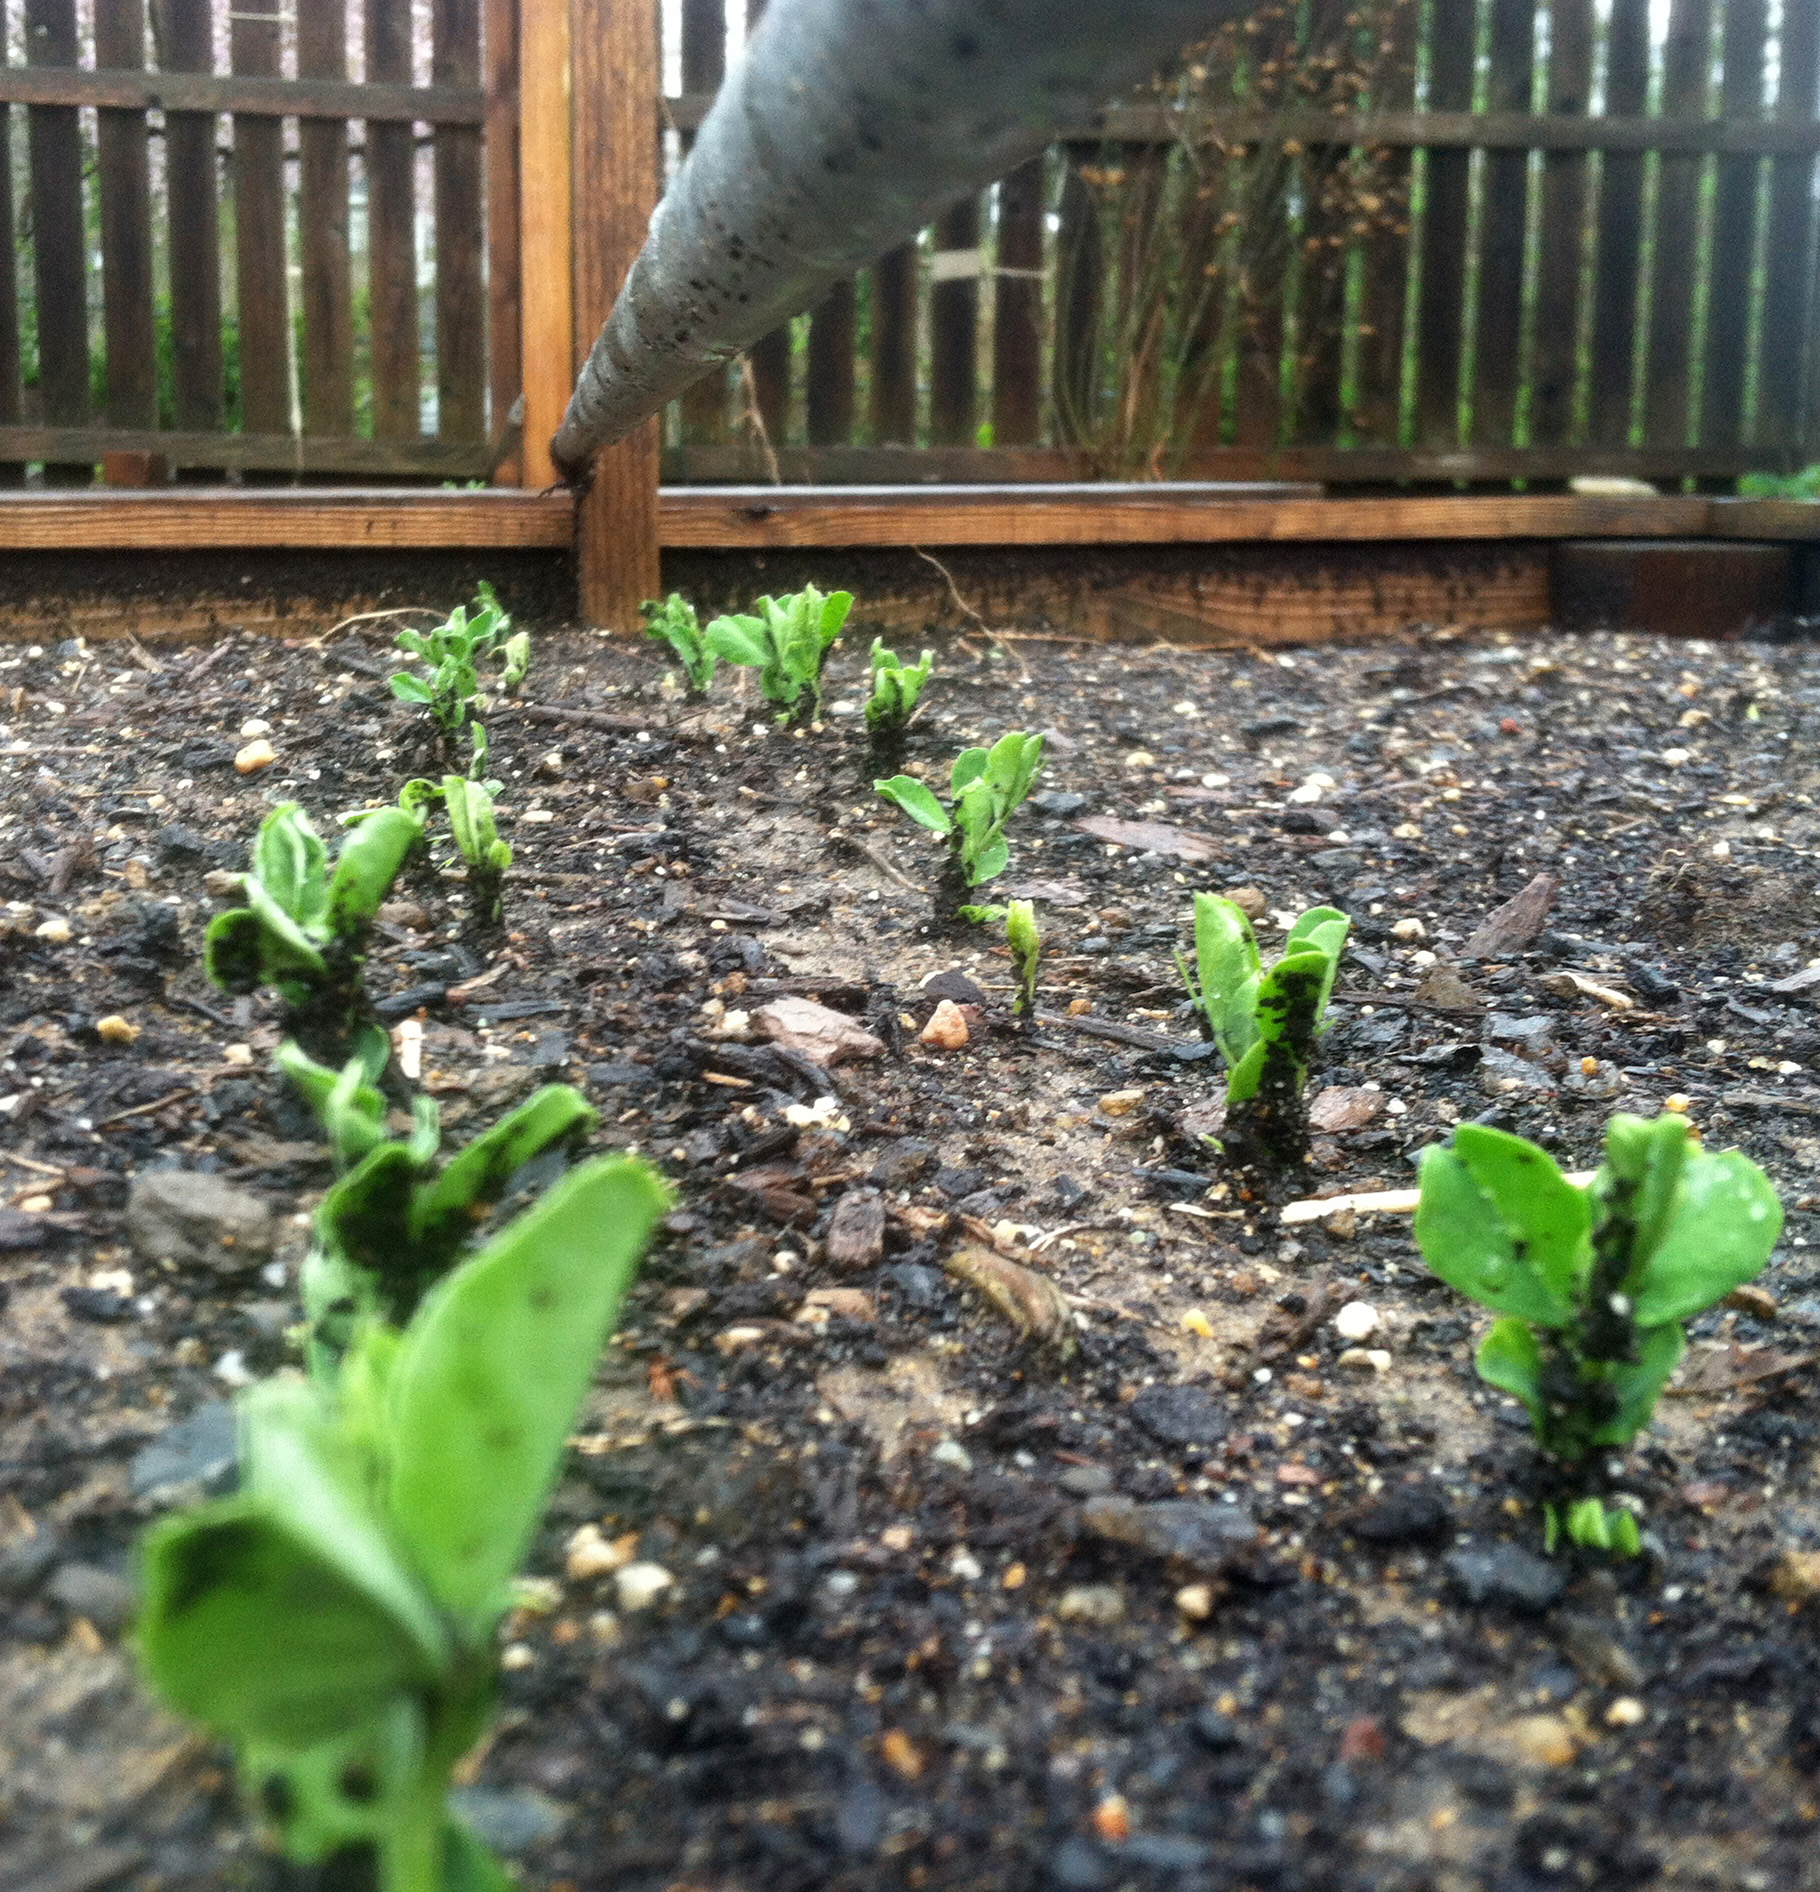
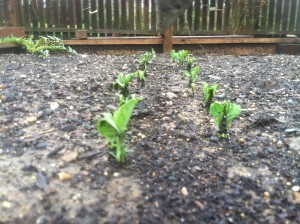
    Let’s skip ahead another two weeks (oh what a long time that is when I’m waiting for seeds to sprout) to April 12, 2013, when — there they were! — the first pea sprouts of the season:

    Peas on paradeLotsalettuce
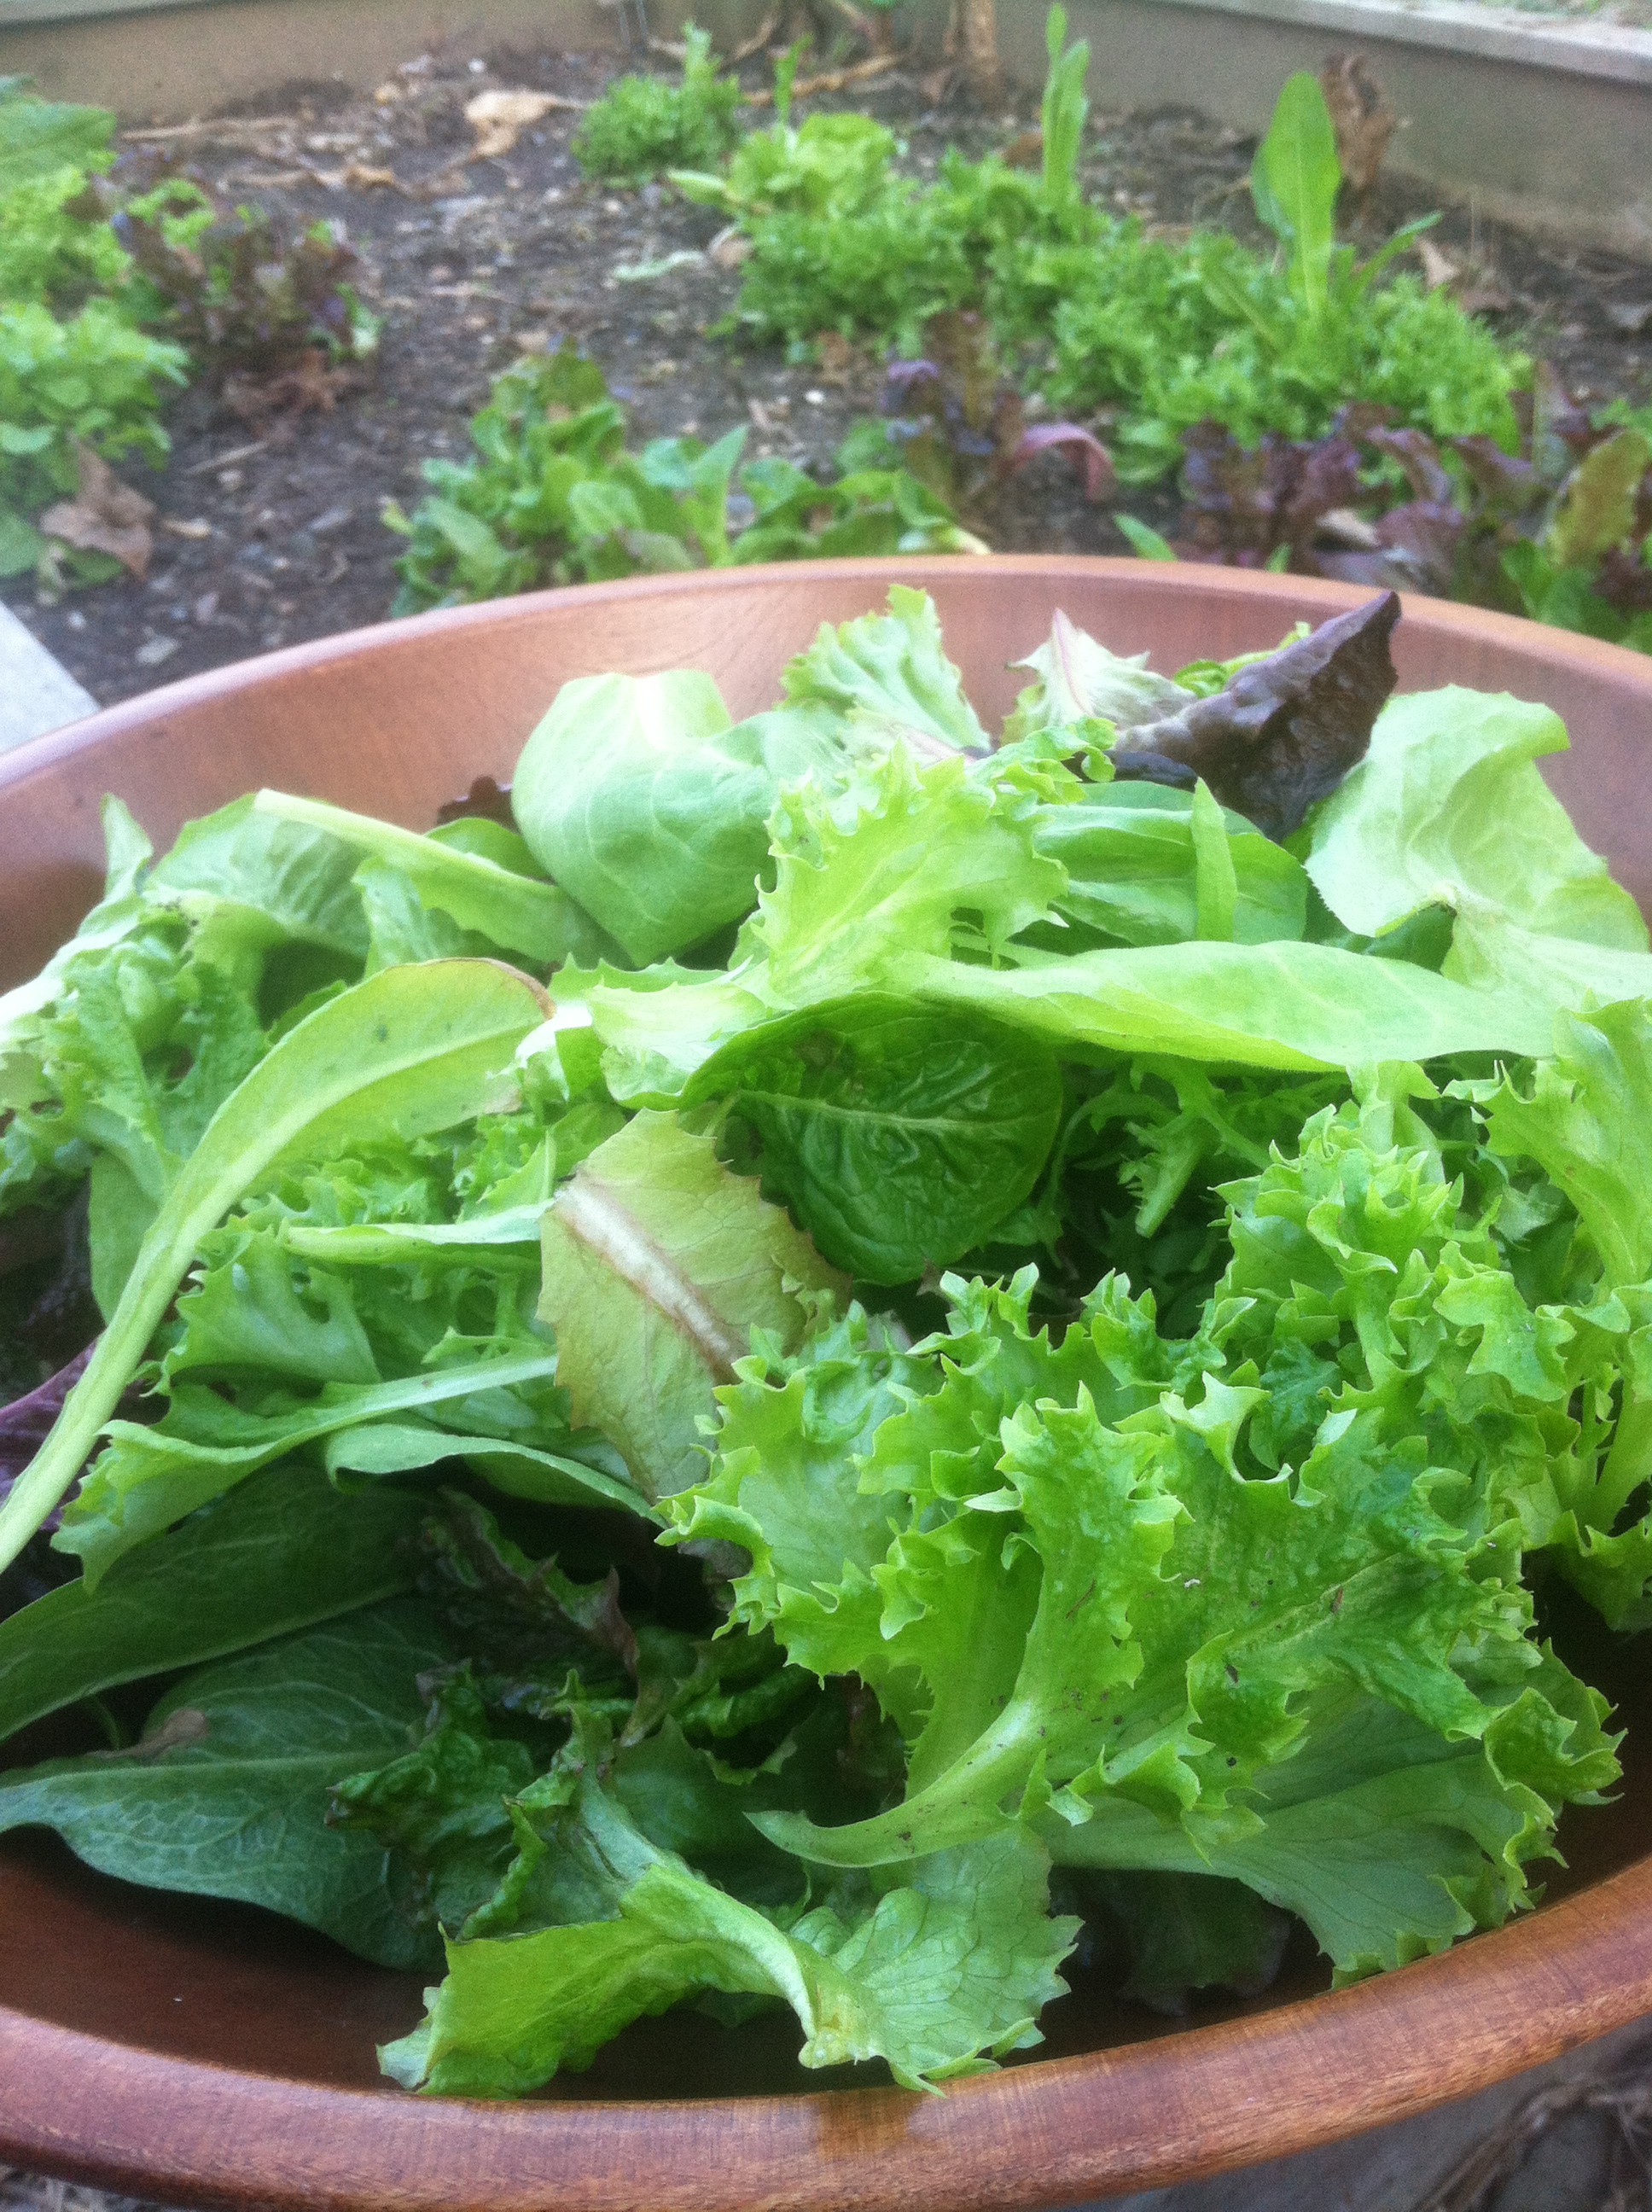
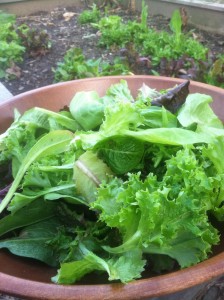
Ok, now we’re moving. Two days later, April 14, 2013, we had the first harvest of lettuce.

    It’s hard to describe what happens when it’s time to pick lettuce: the sense of it being too early, really, for anything but a taste and the discovery that I’ve filled an entire salad bowl and hardly changed how the lettuce patch looks… the soft aroma of the leaves as I proudly carry the bowl inside… the profound realization of just how much more vibrant, precise and deep the flavors are compared to anything that can be bought in the store… the simple pleasure of welcoming a new season’s worth of flavor to the table.

    Please peas me
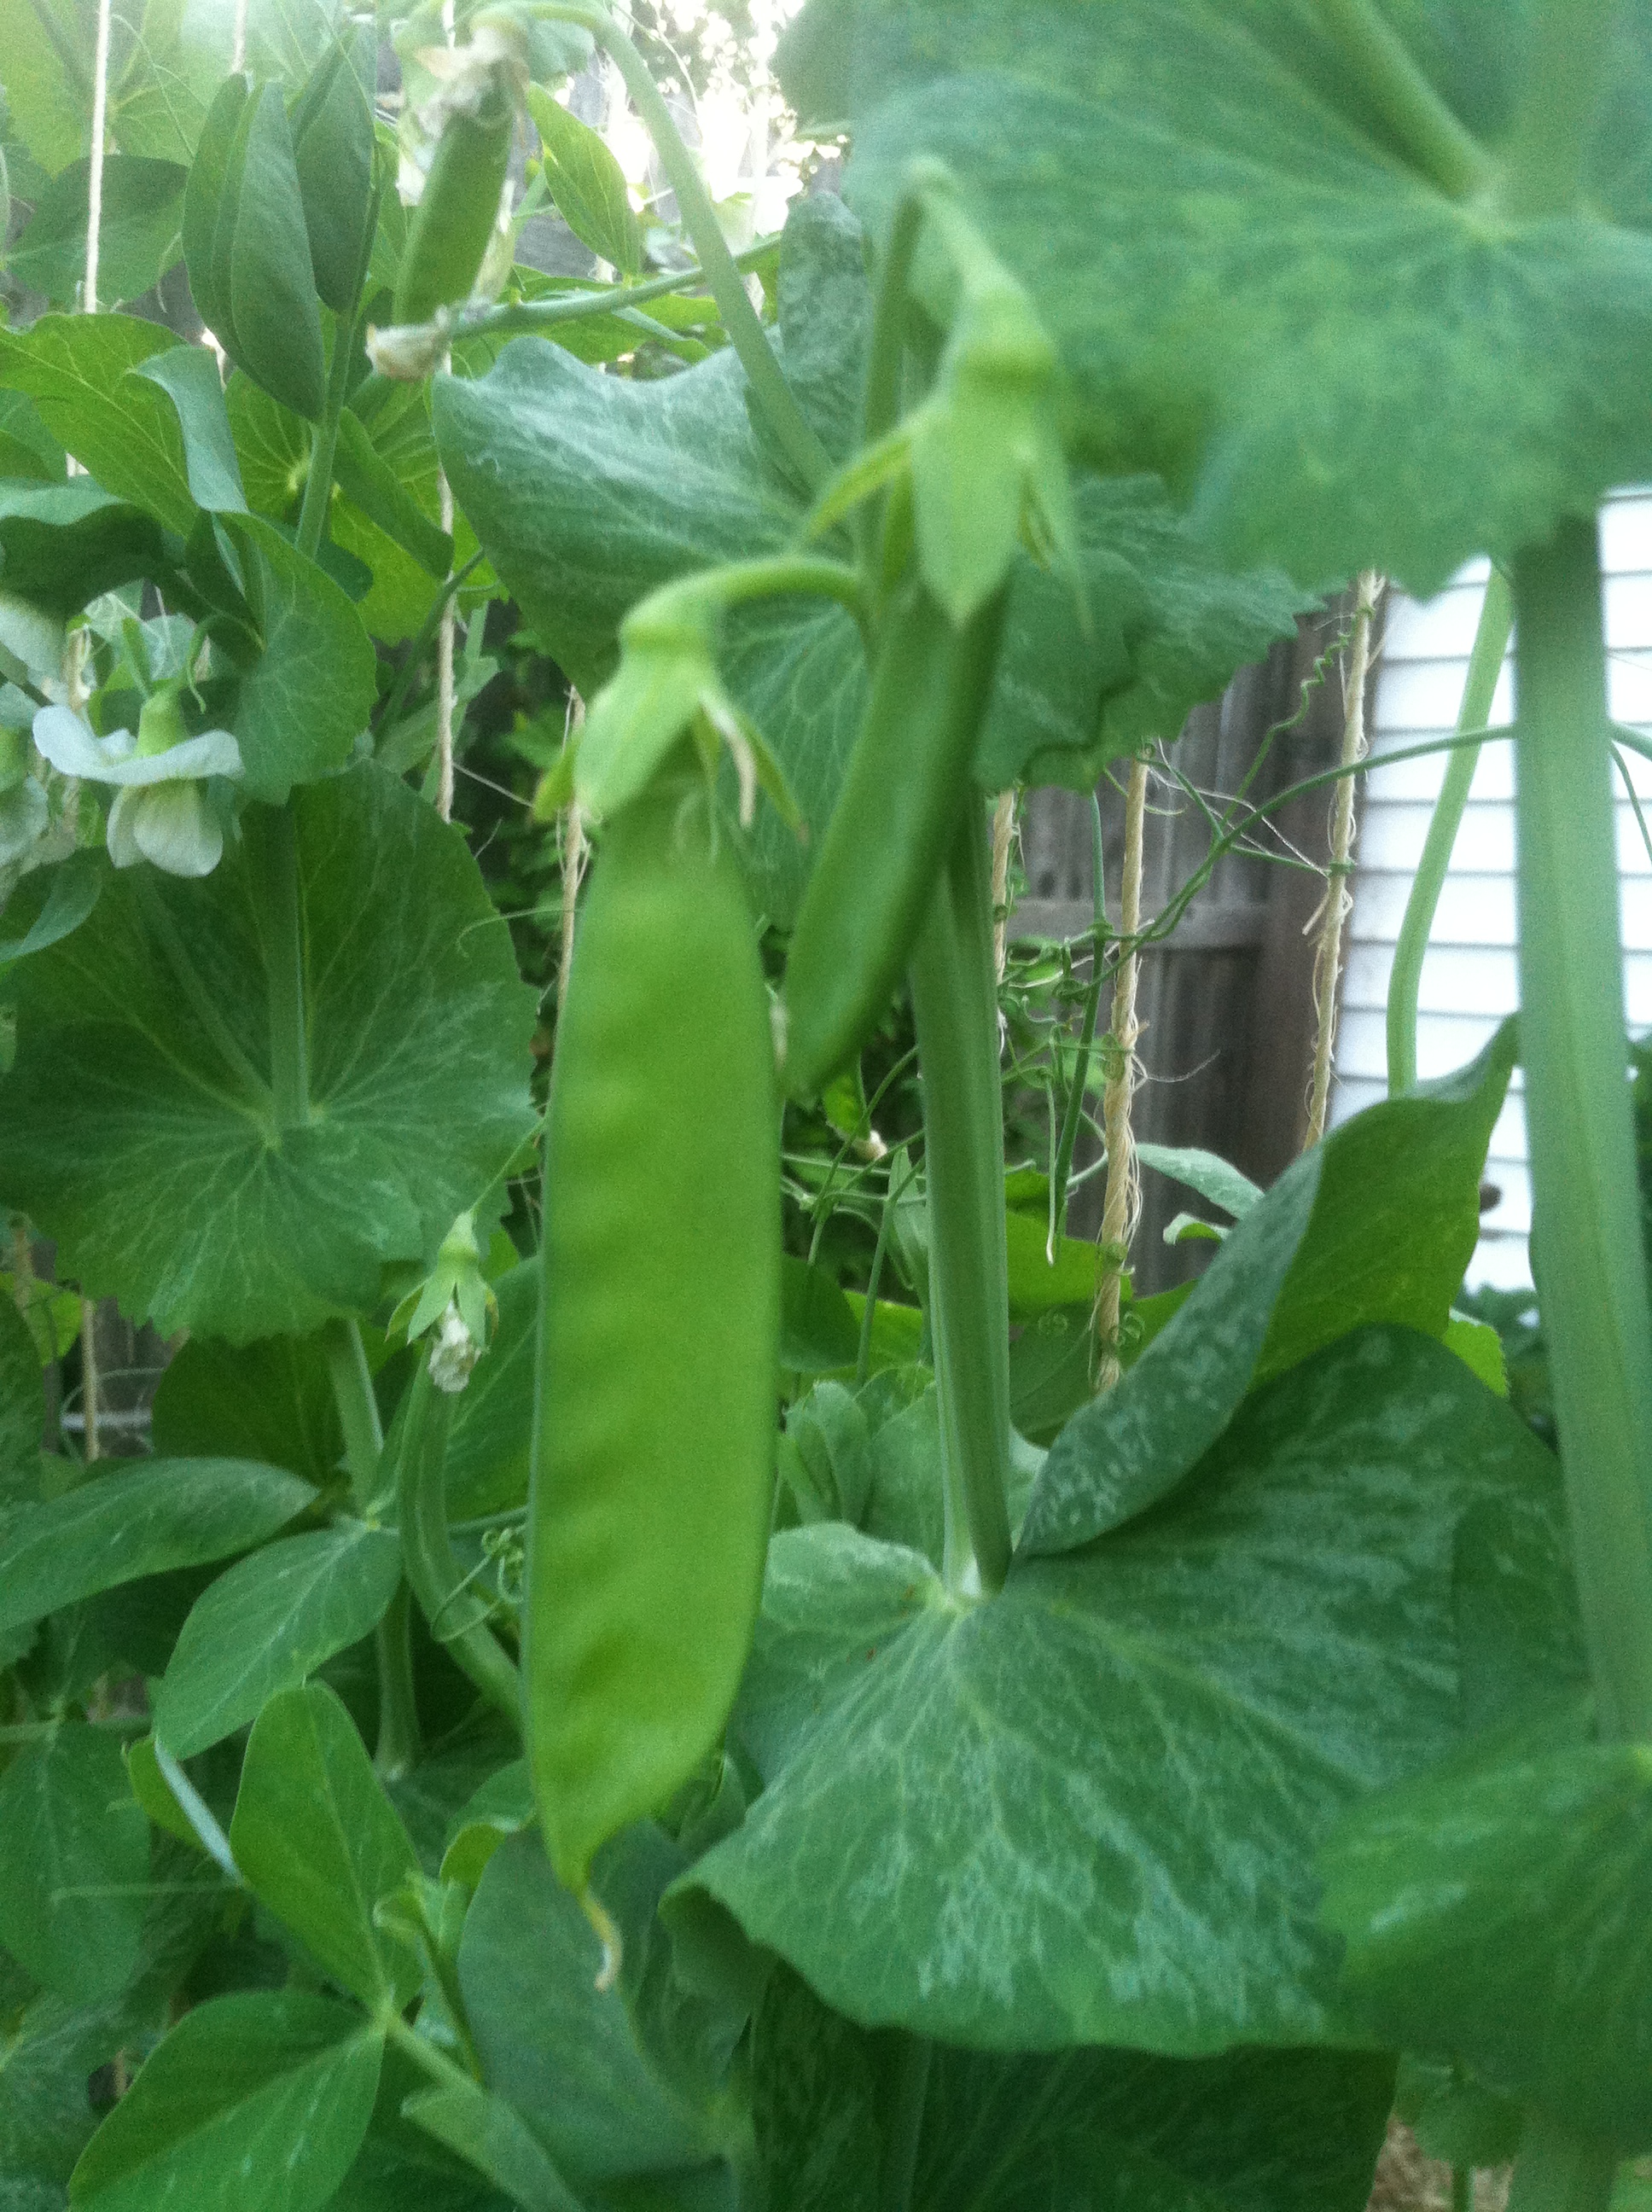
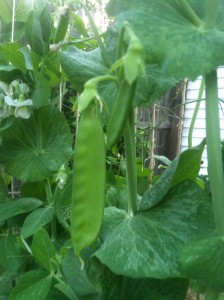
Meanwhile, back with the peas: Here’s one to harvest on May 30, 2013.

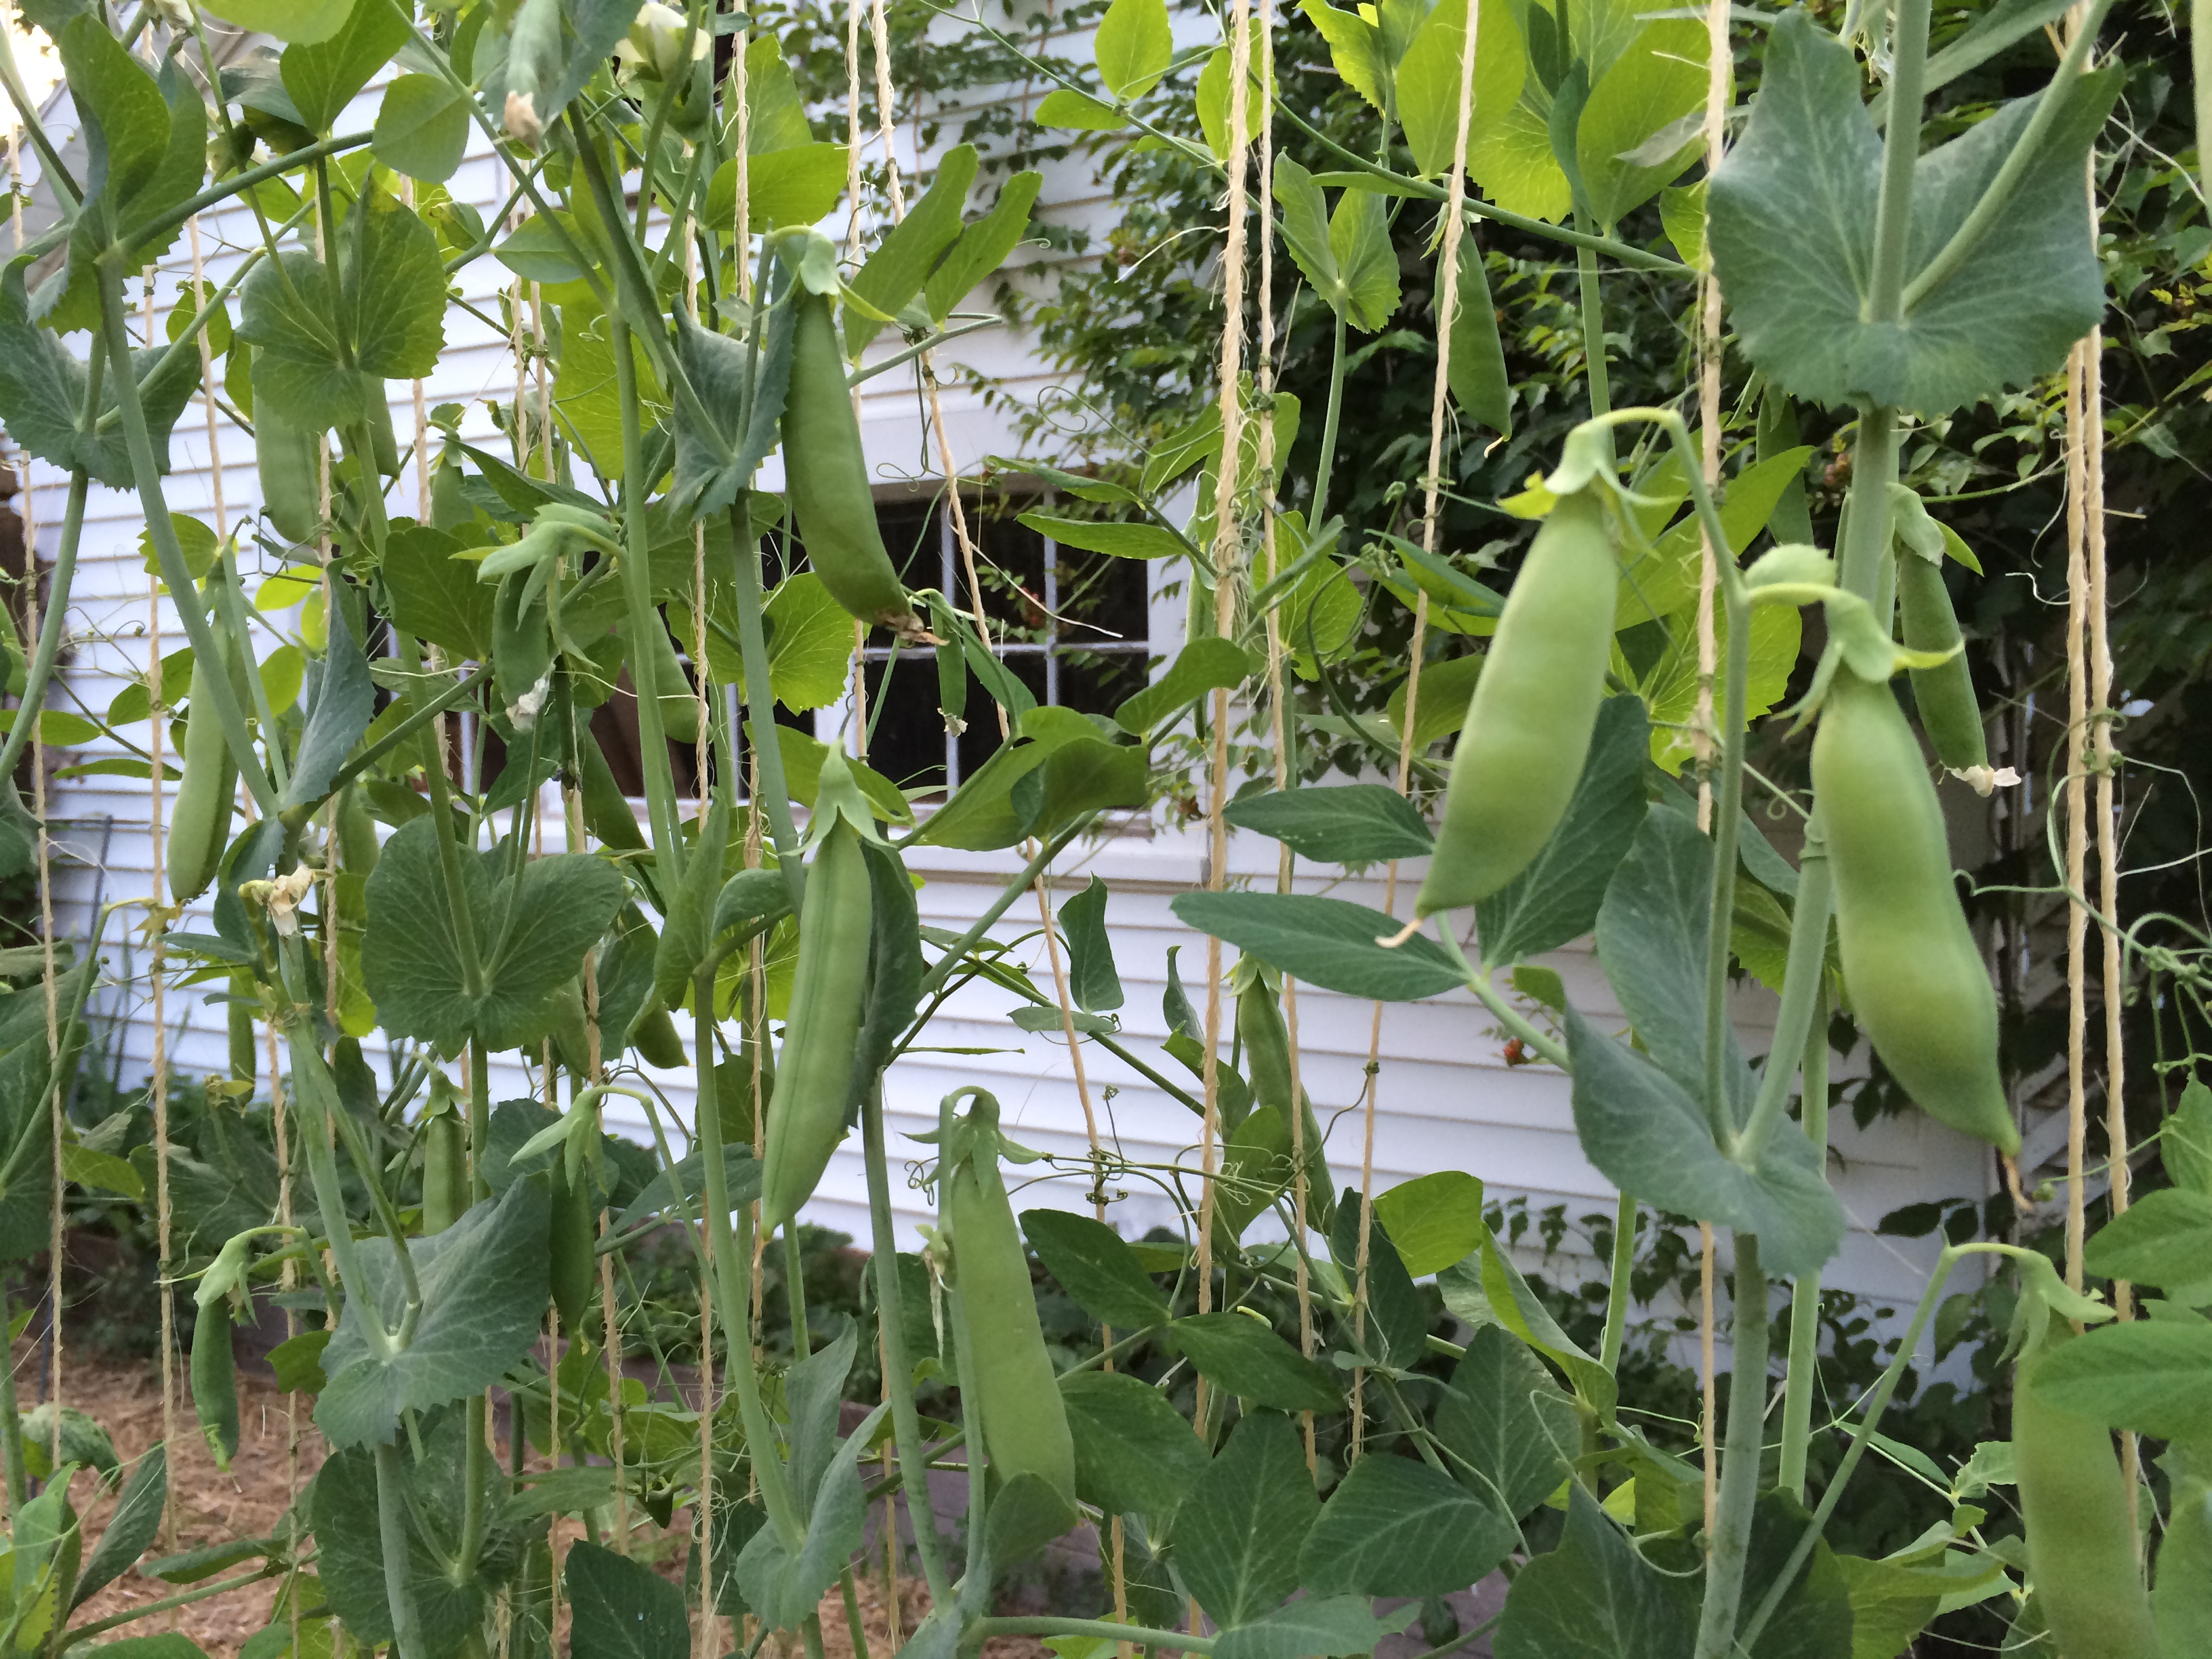
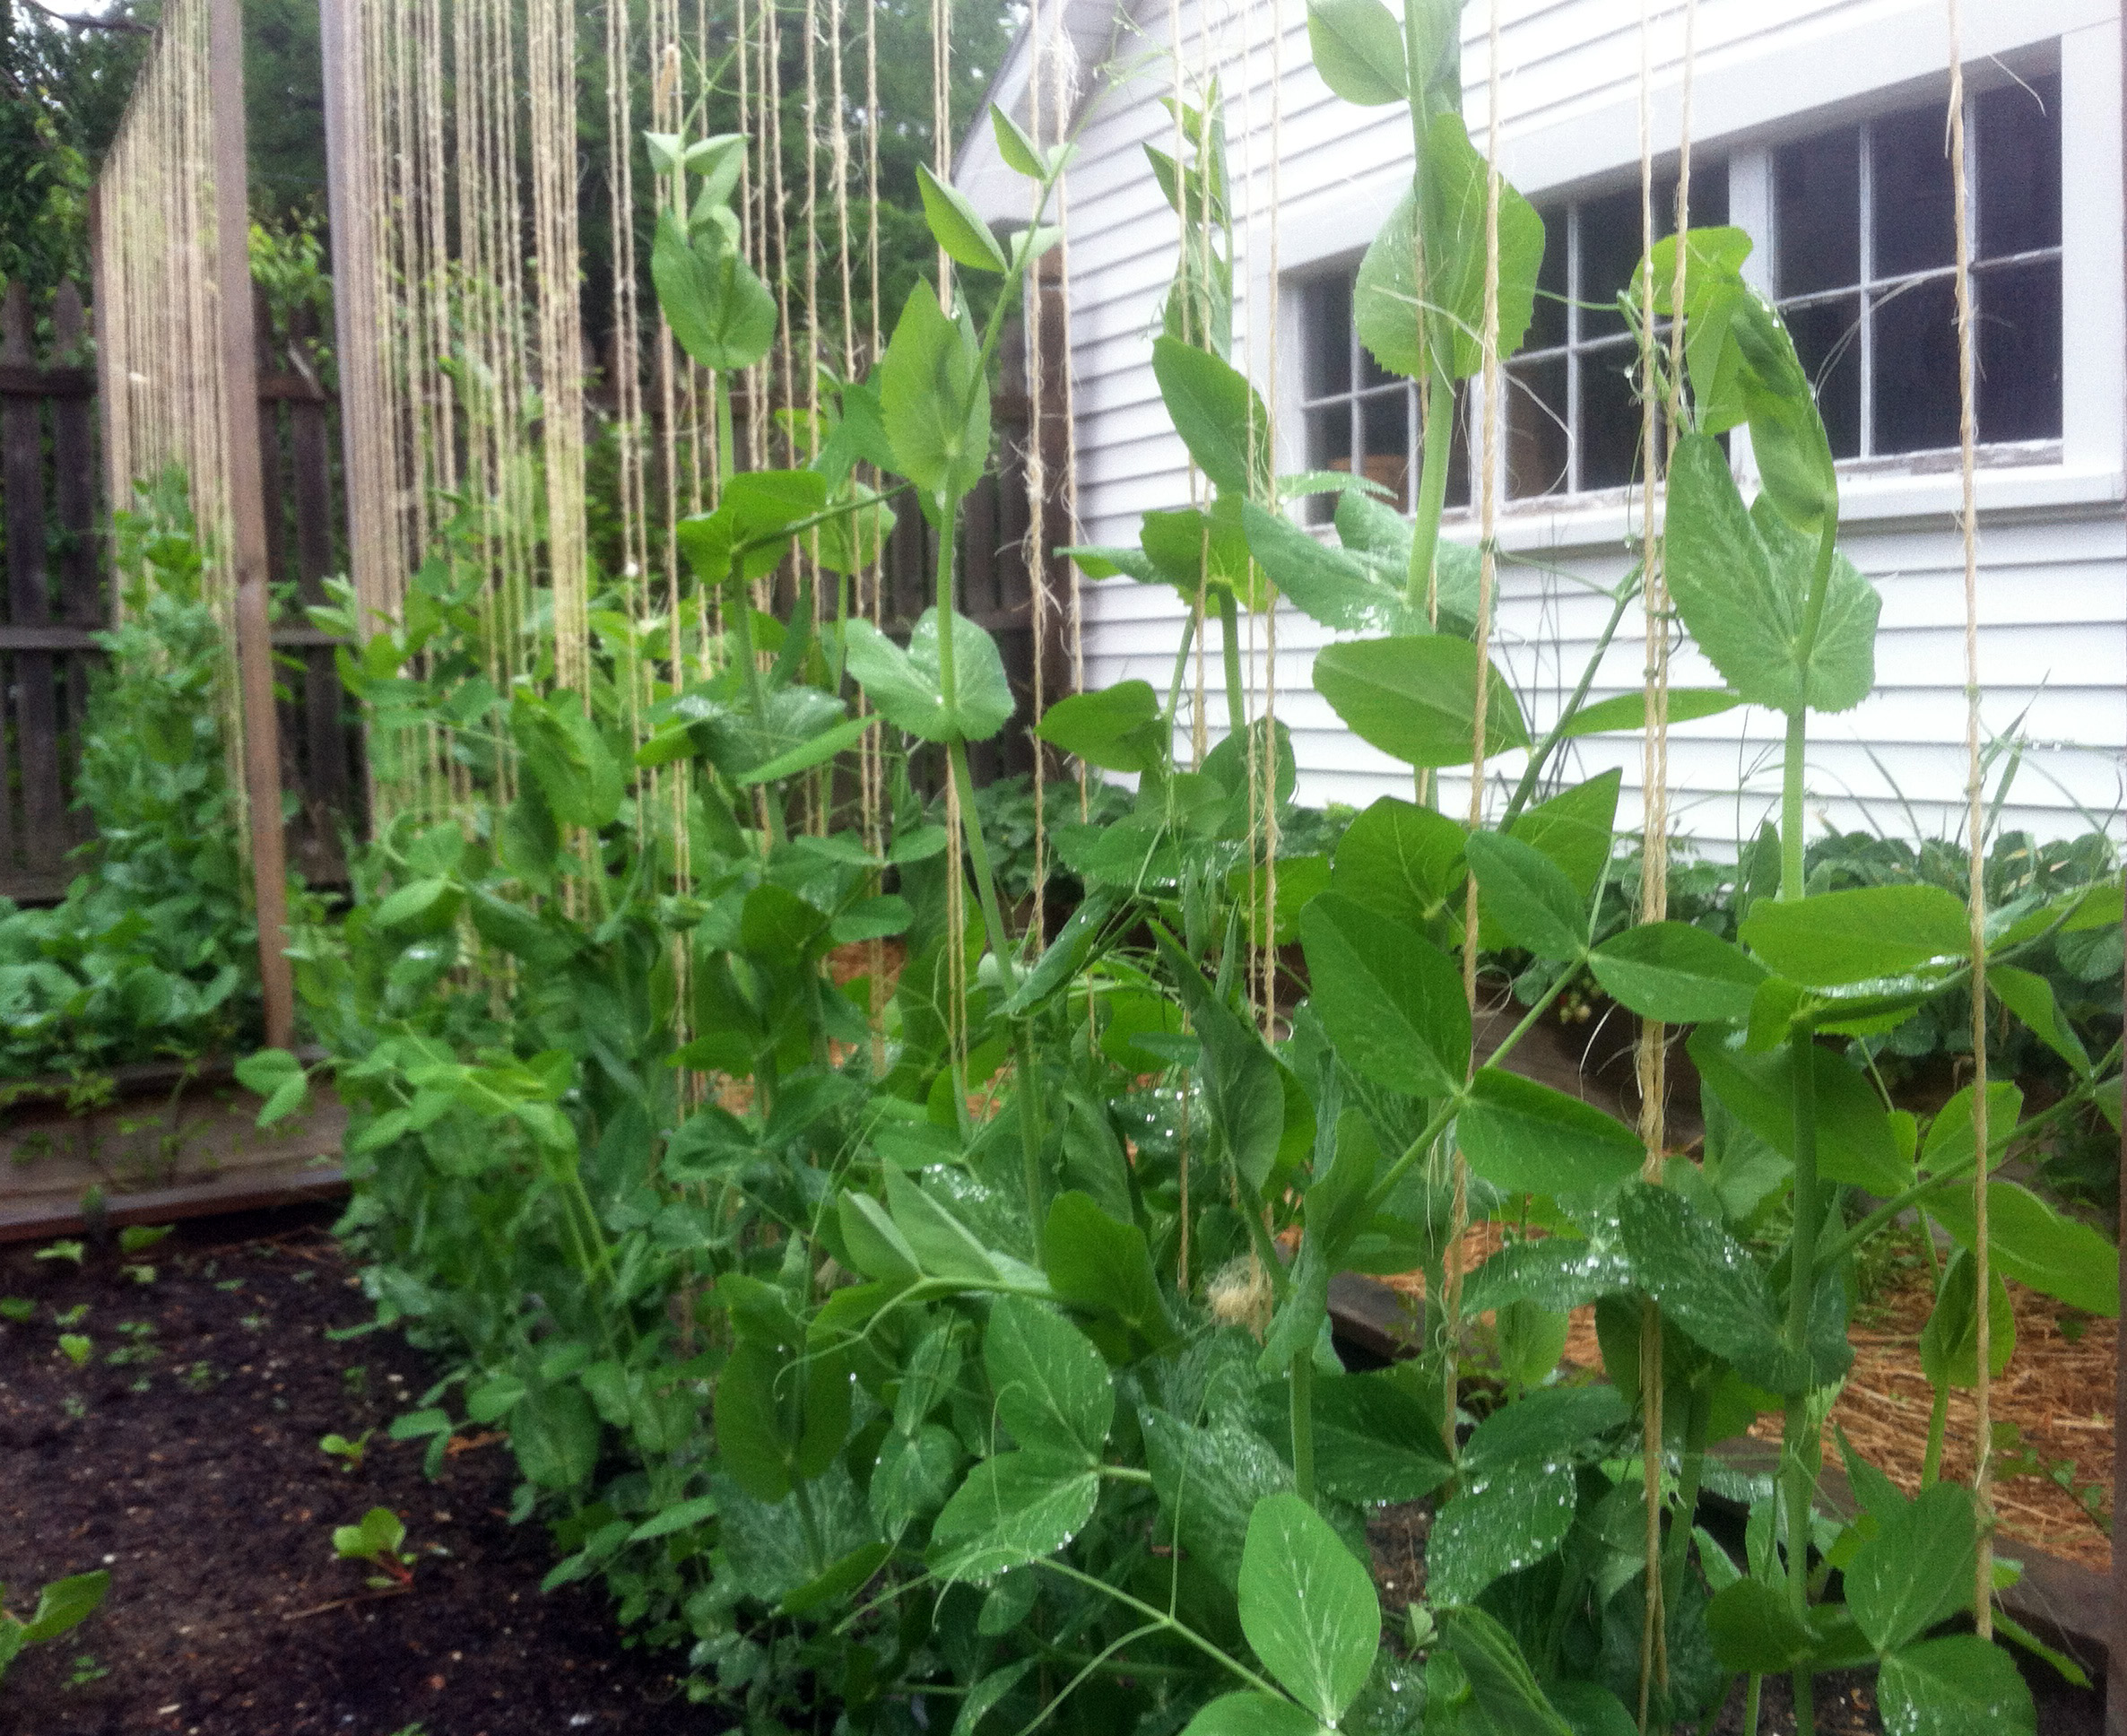
    From that point on for the next several weeks they came like gangbusters. Snow peas and sugar snaps. Racing up the trellis, they formed a great green wall. Only this wall is specked by white flowers, each one signalling the arrival of a pea pod.

    Don’t forget, the early shoots are delicious too. When we harvest lettuce, we often stop by the wall-of-peas and clip some tendrils to sprinkle on top of the salad bowl. Of course some chopped up peas go in the salad too.

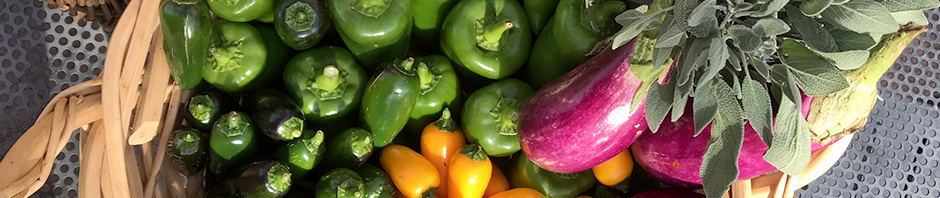
    Let’s change colors. Also on May 30, here’s what was coming from the raised bed four feet behind the peas. This is a case where red and green don’t signal Christmas whatsoever:

    Strawberries 2013Again, the flavor of a strawberry from your own carefully tended soil can’t be bought.

    Oh, and did I mention the peas kept coming? June 4:

    Peas-a-plentybeans and sandwich
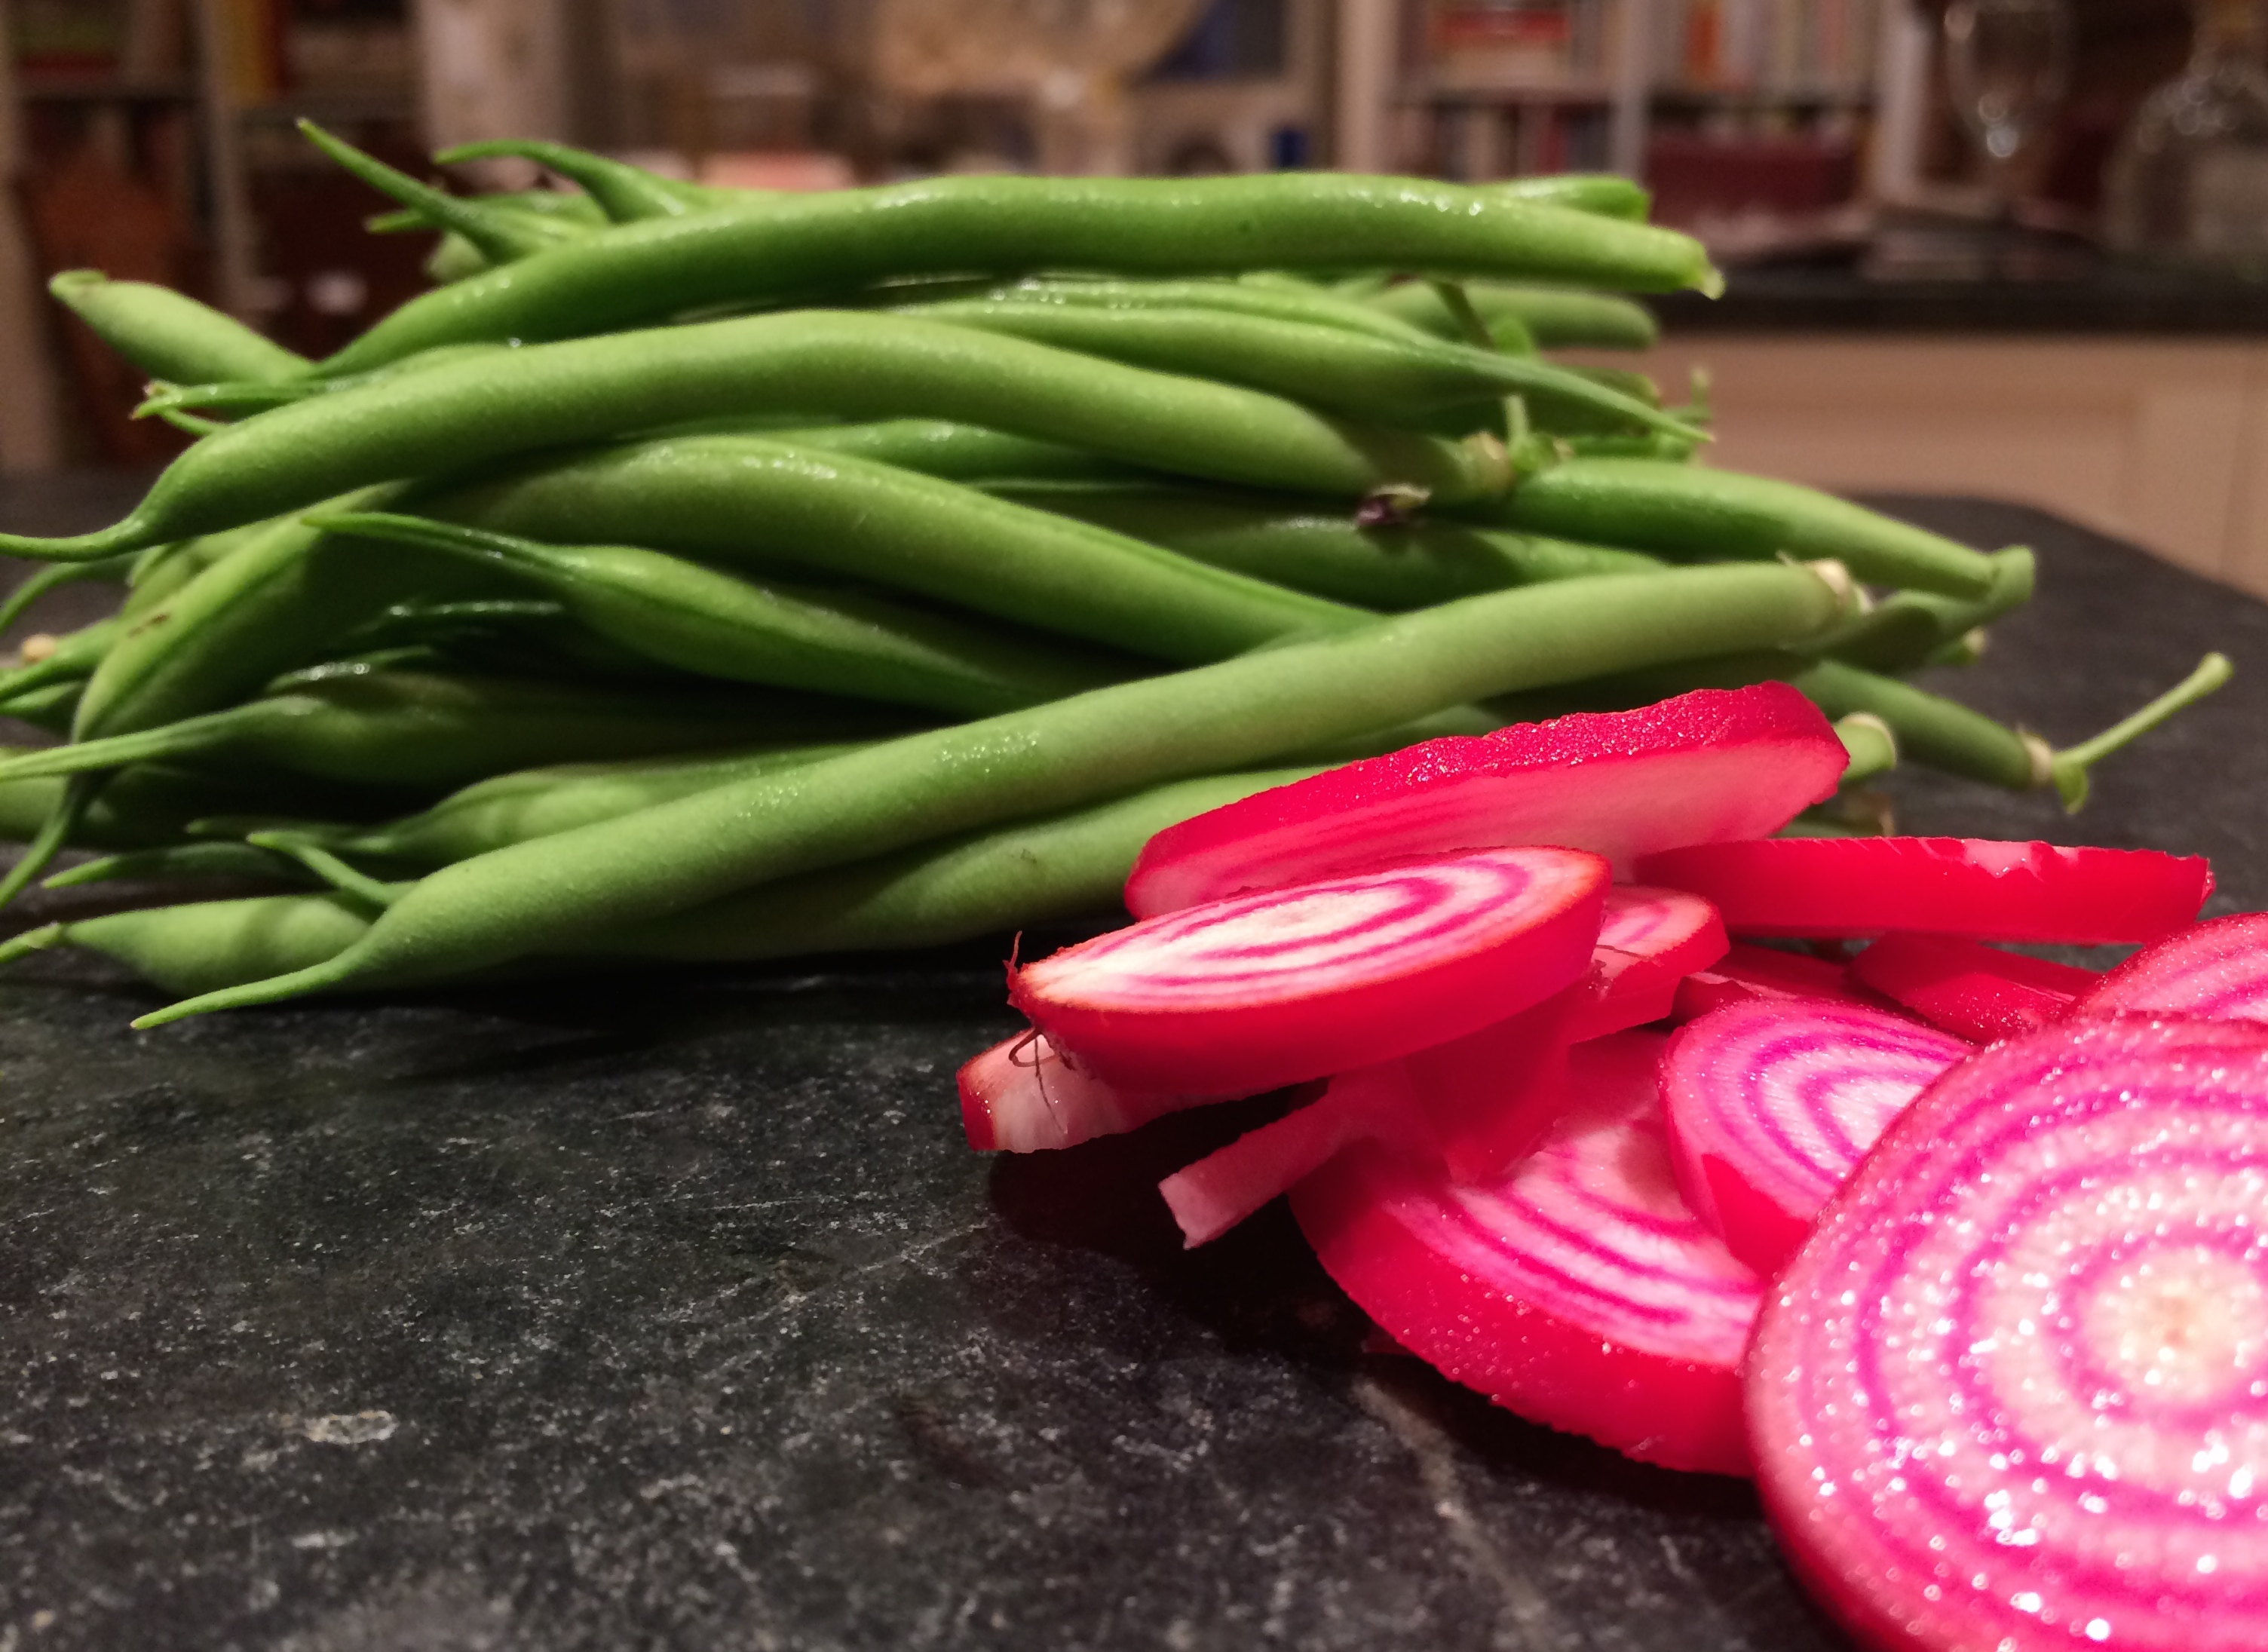
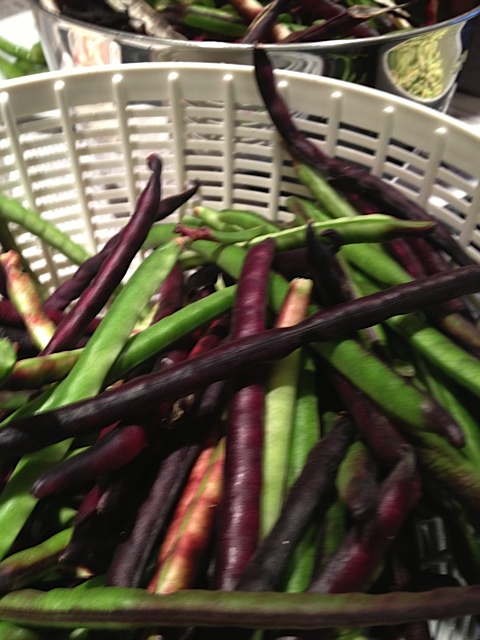
The green beans arrived by June 25 (joining the lettuce, which was still going strong).

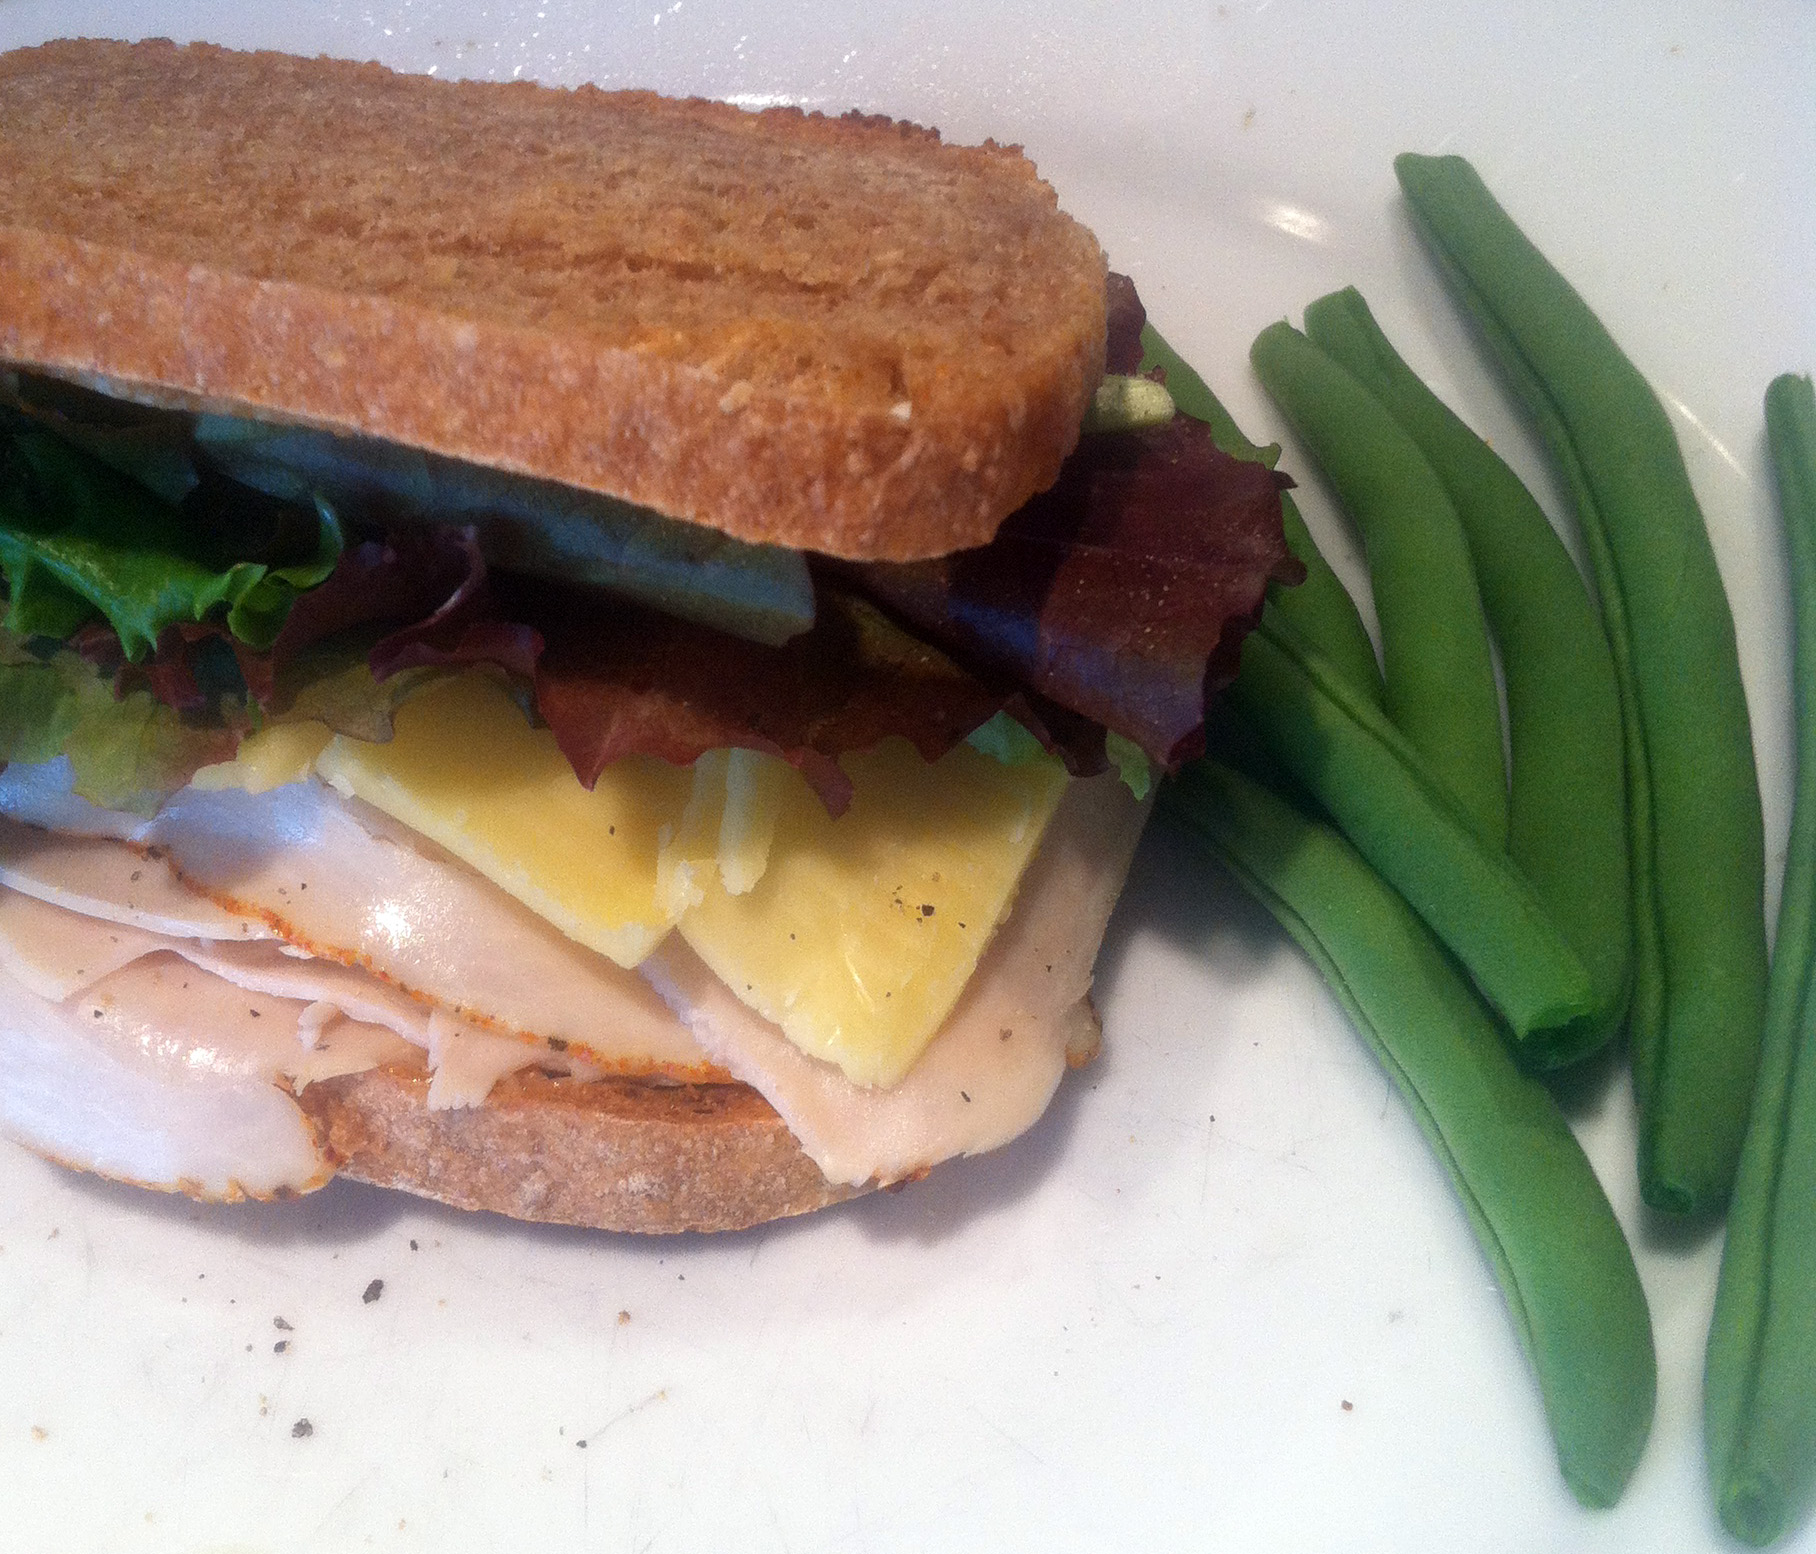
    I like to come home for lunch and pick a few green beans to eat raw with a sandwich. They are sweet and crunchy like candy.

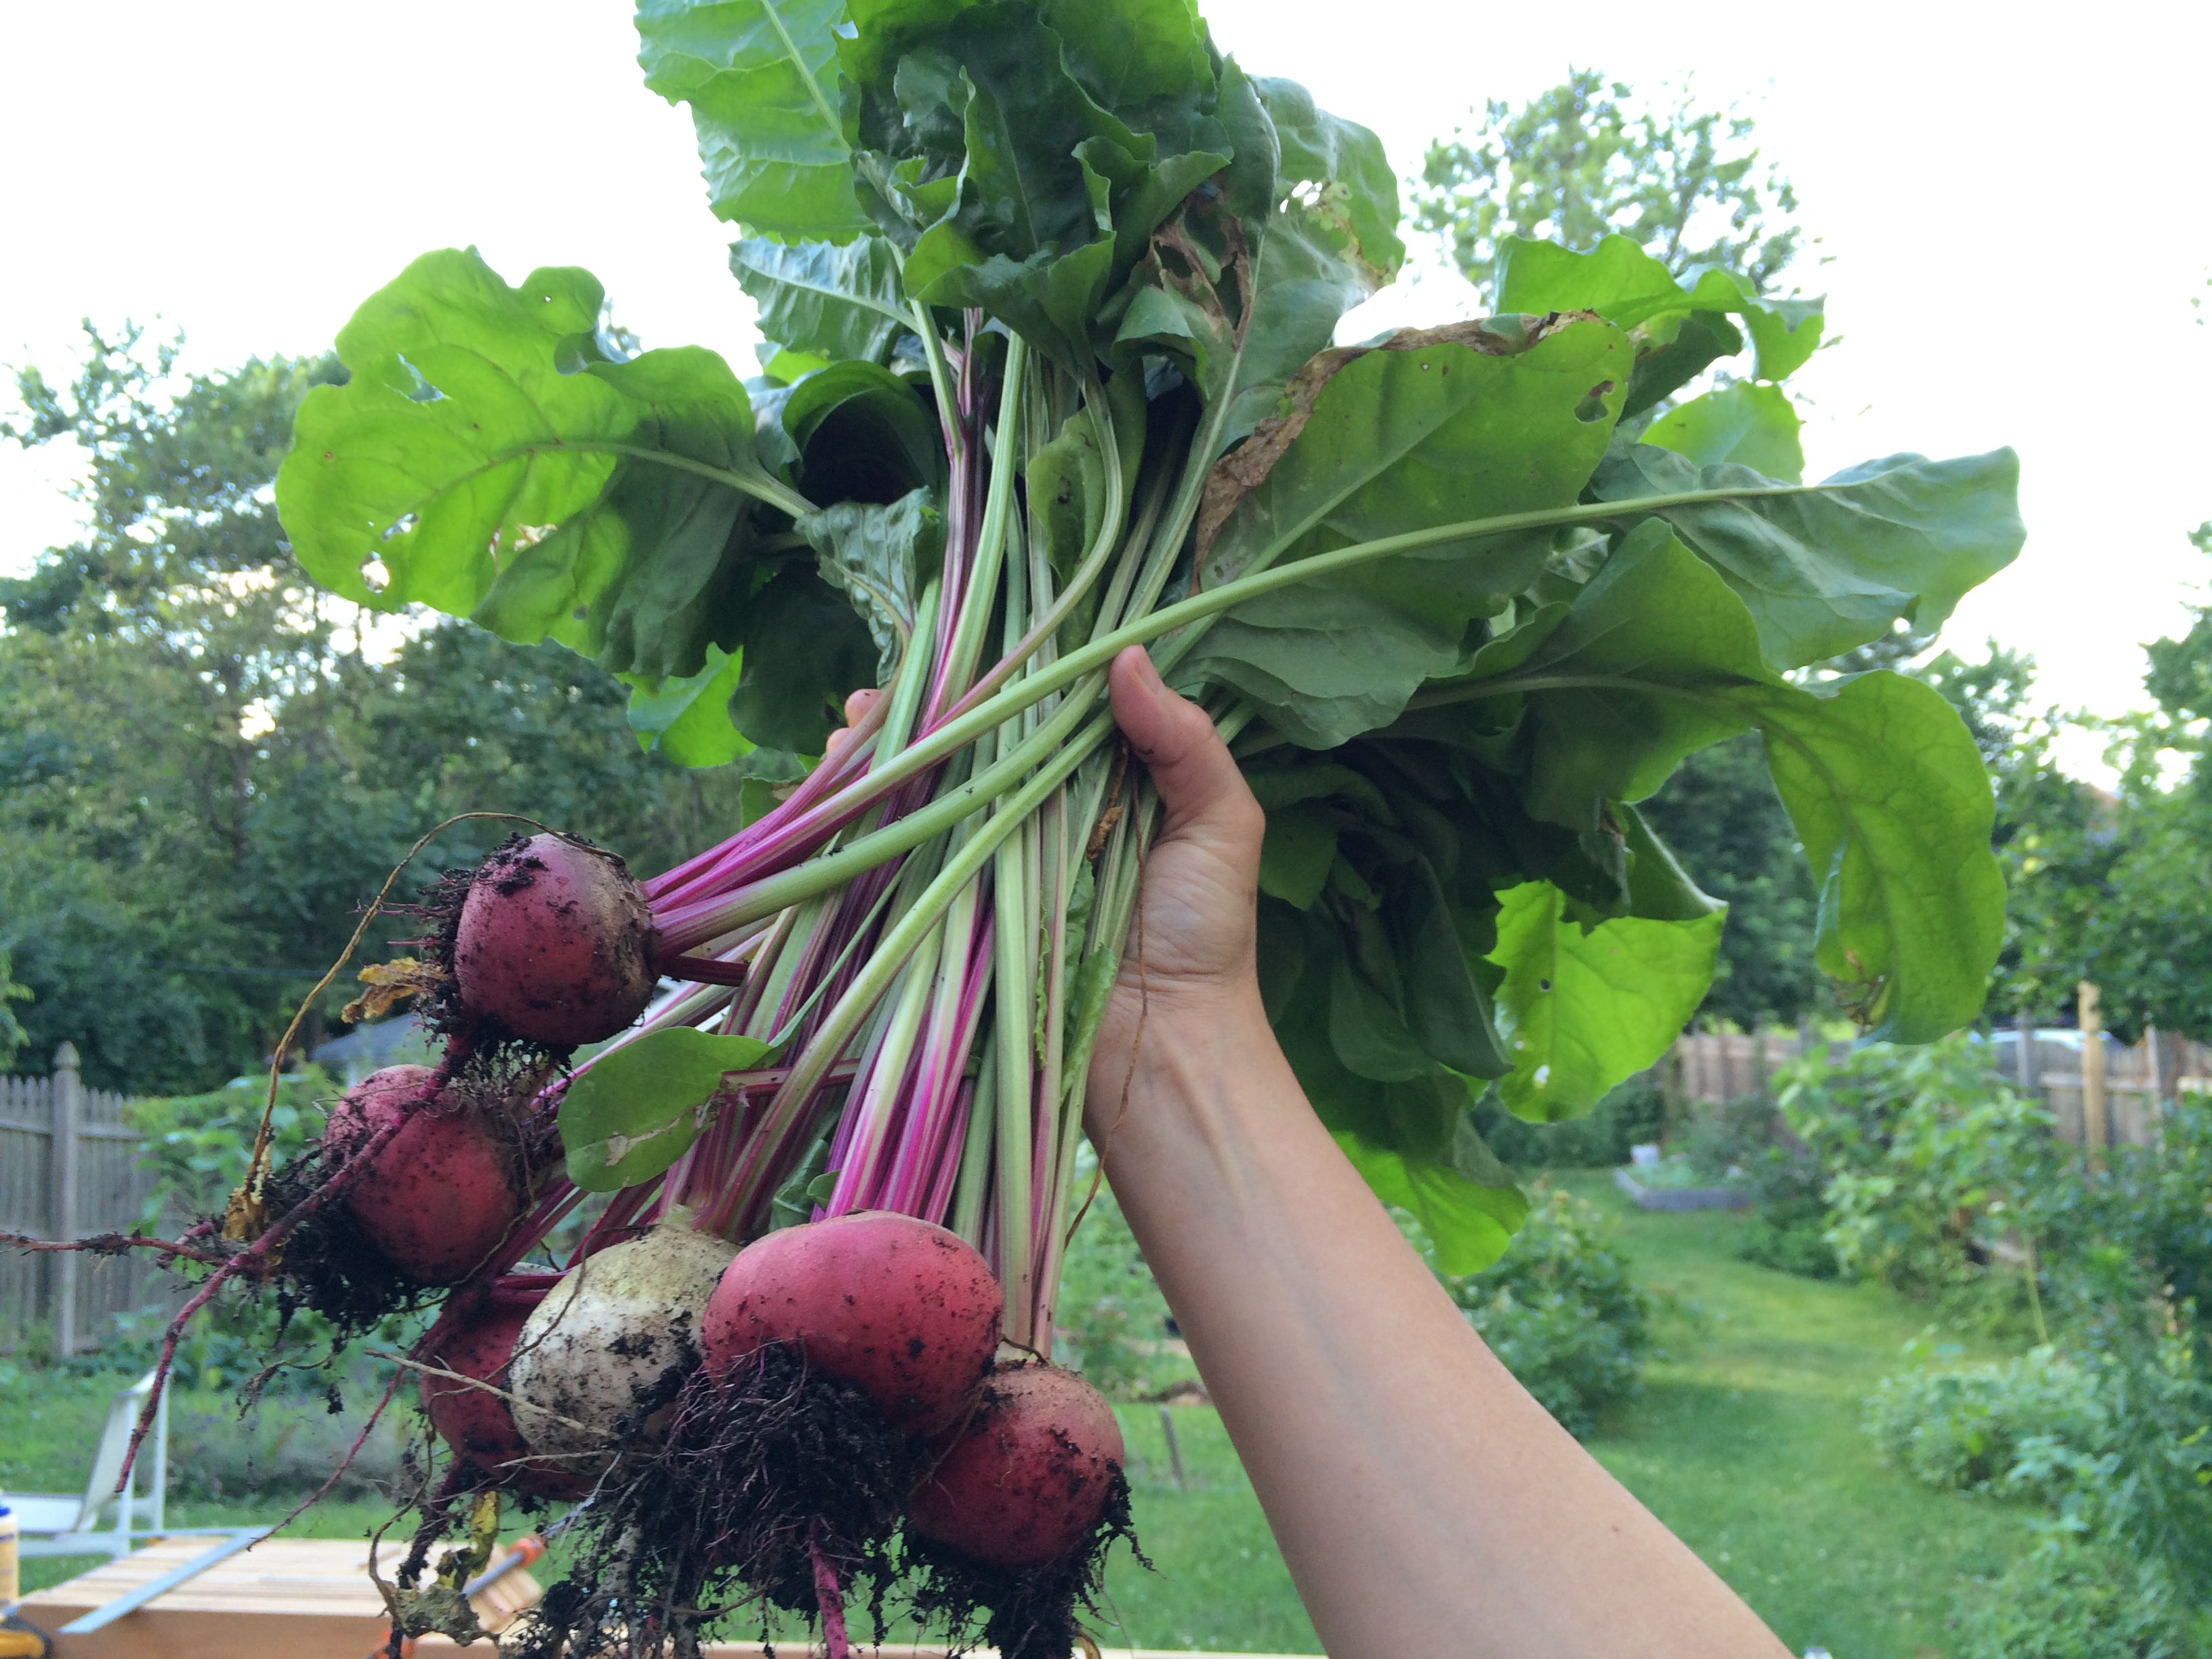
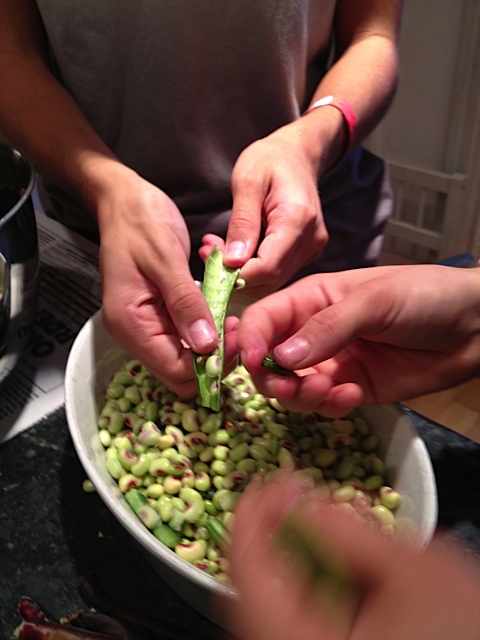
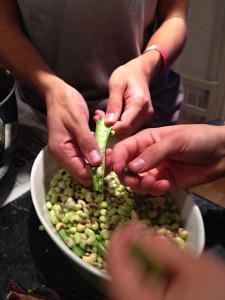
    More colors – we had a bumper crop of pink-eyed purple-hulled peas. Fun to shell, delicious to eat. These photos from August 21 courtesy of Karla Cook:

    pink-eyed purple hullpink-eyed purple hull whole


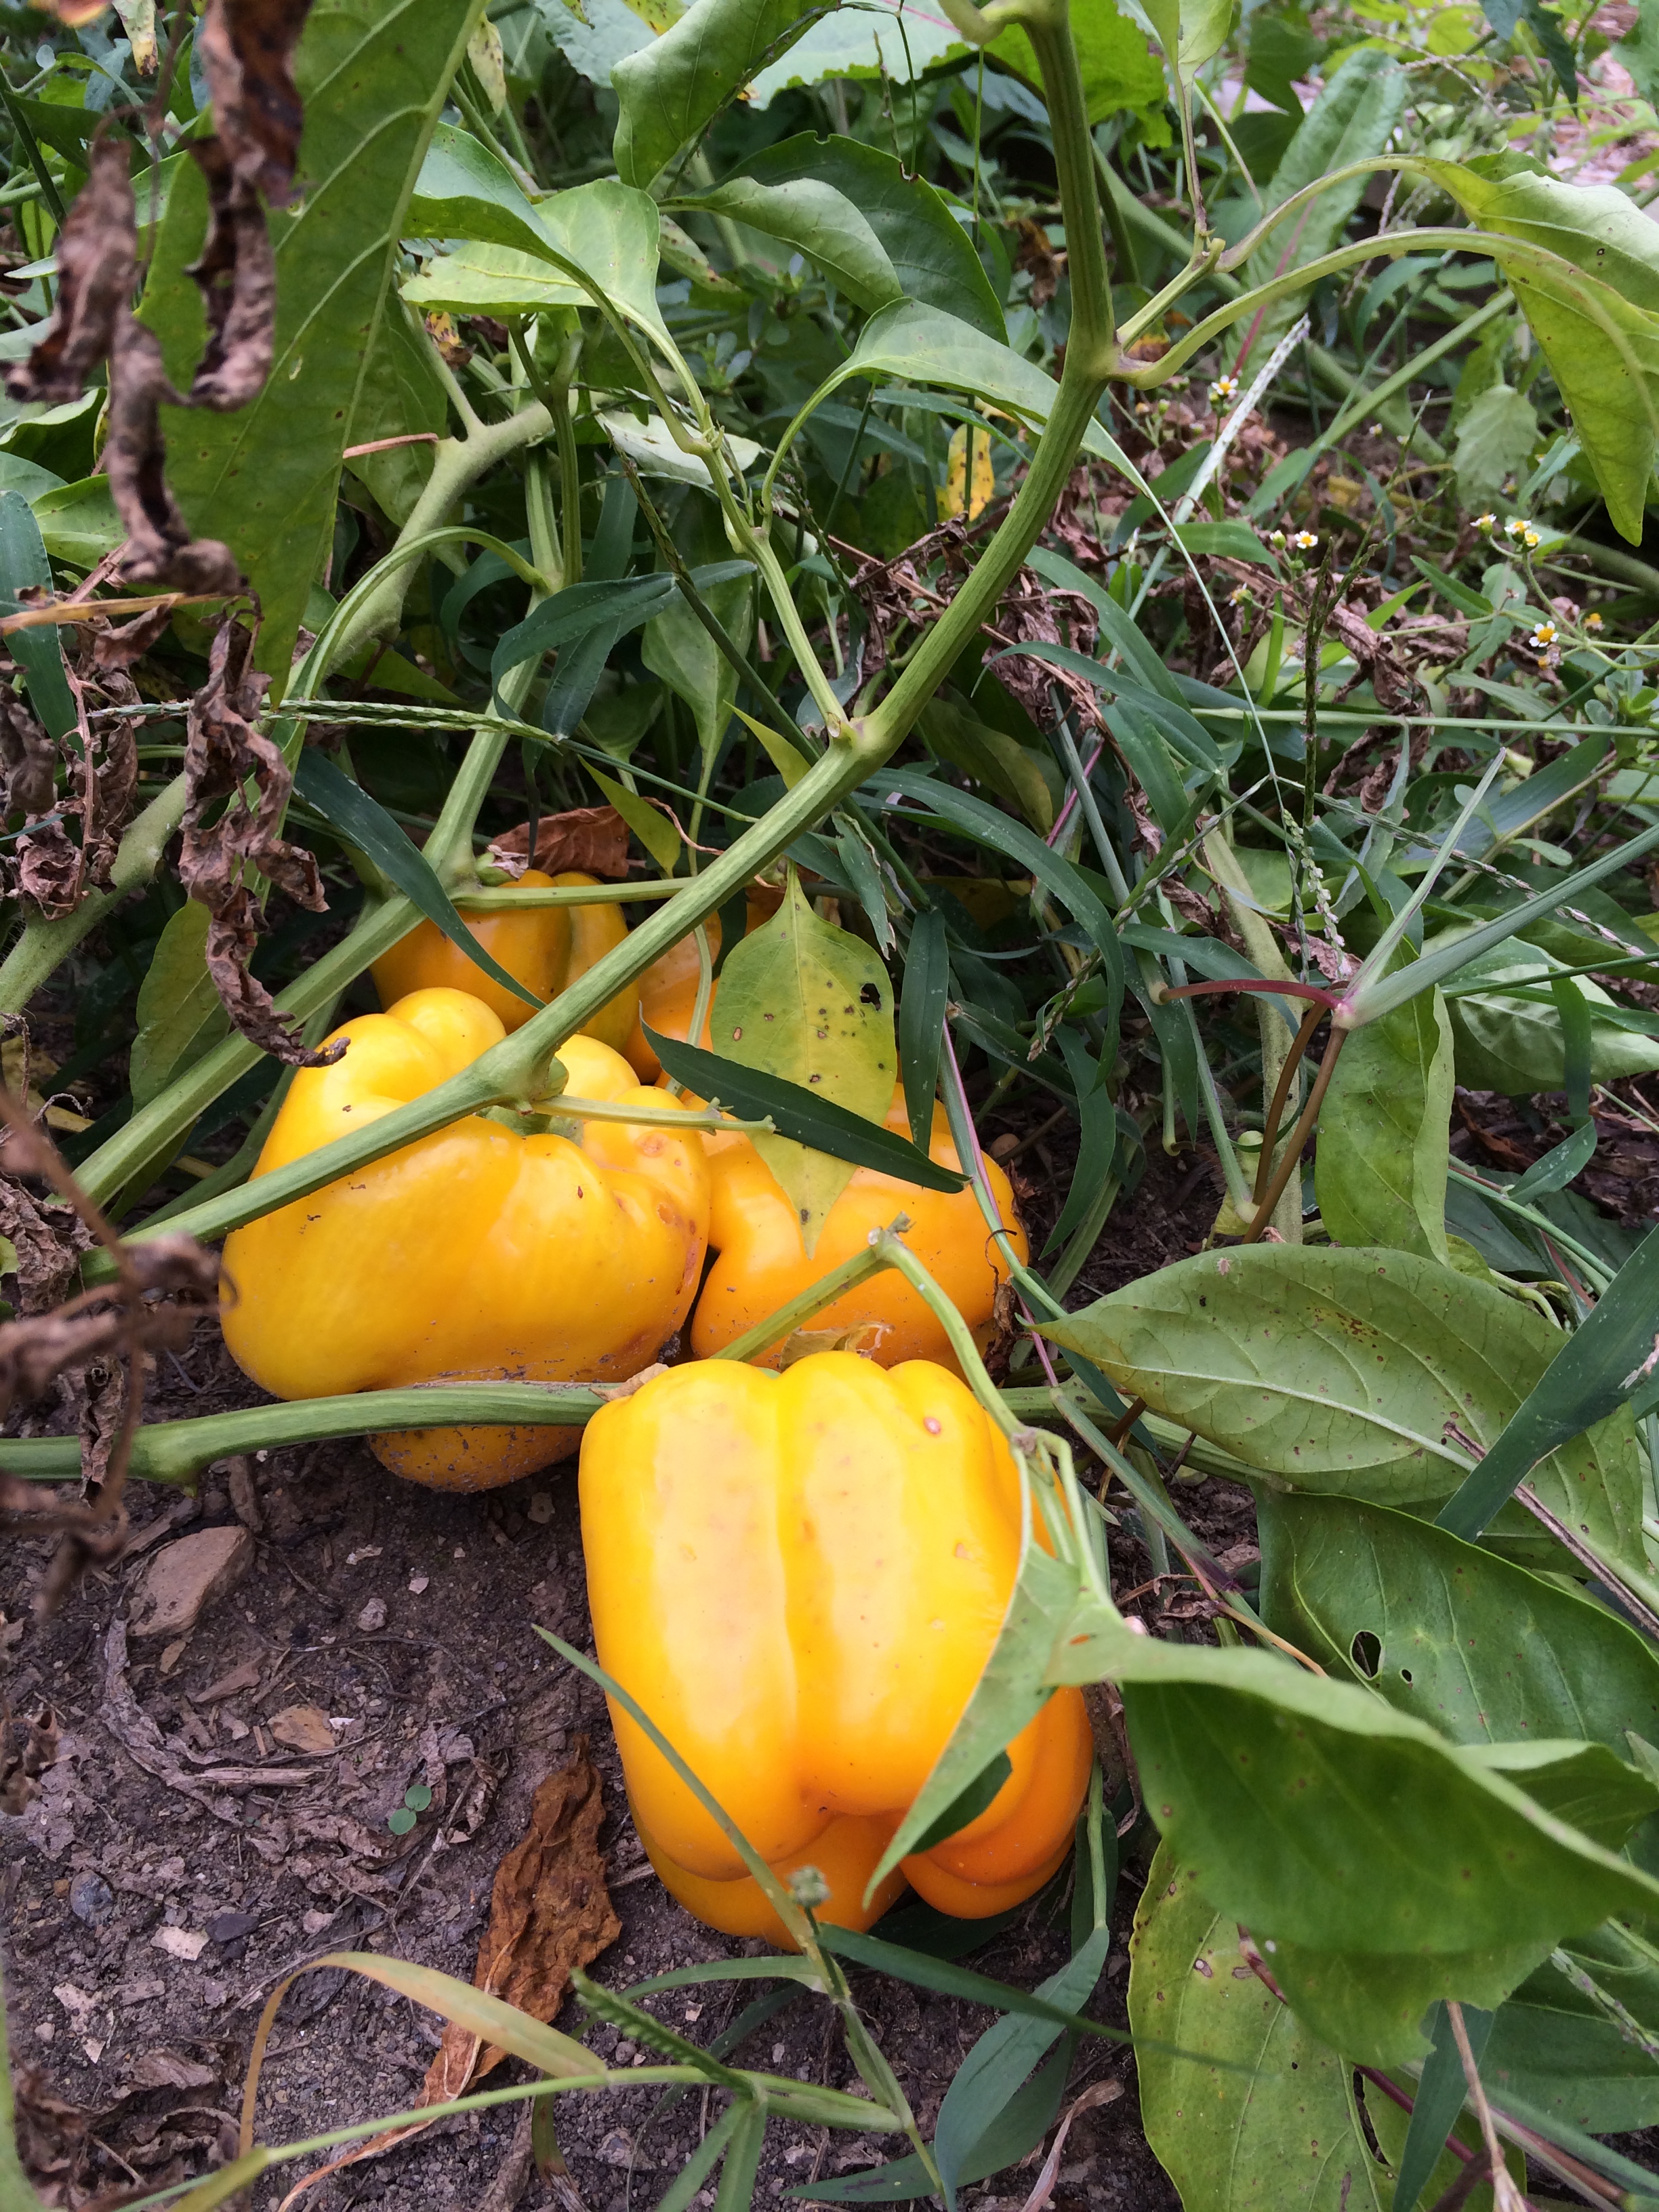
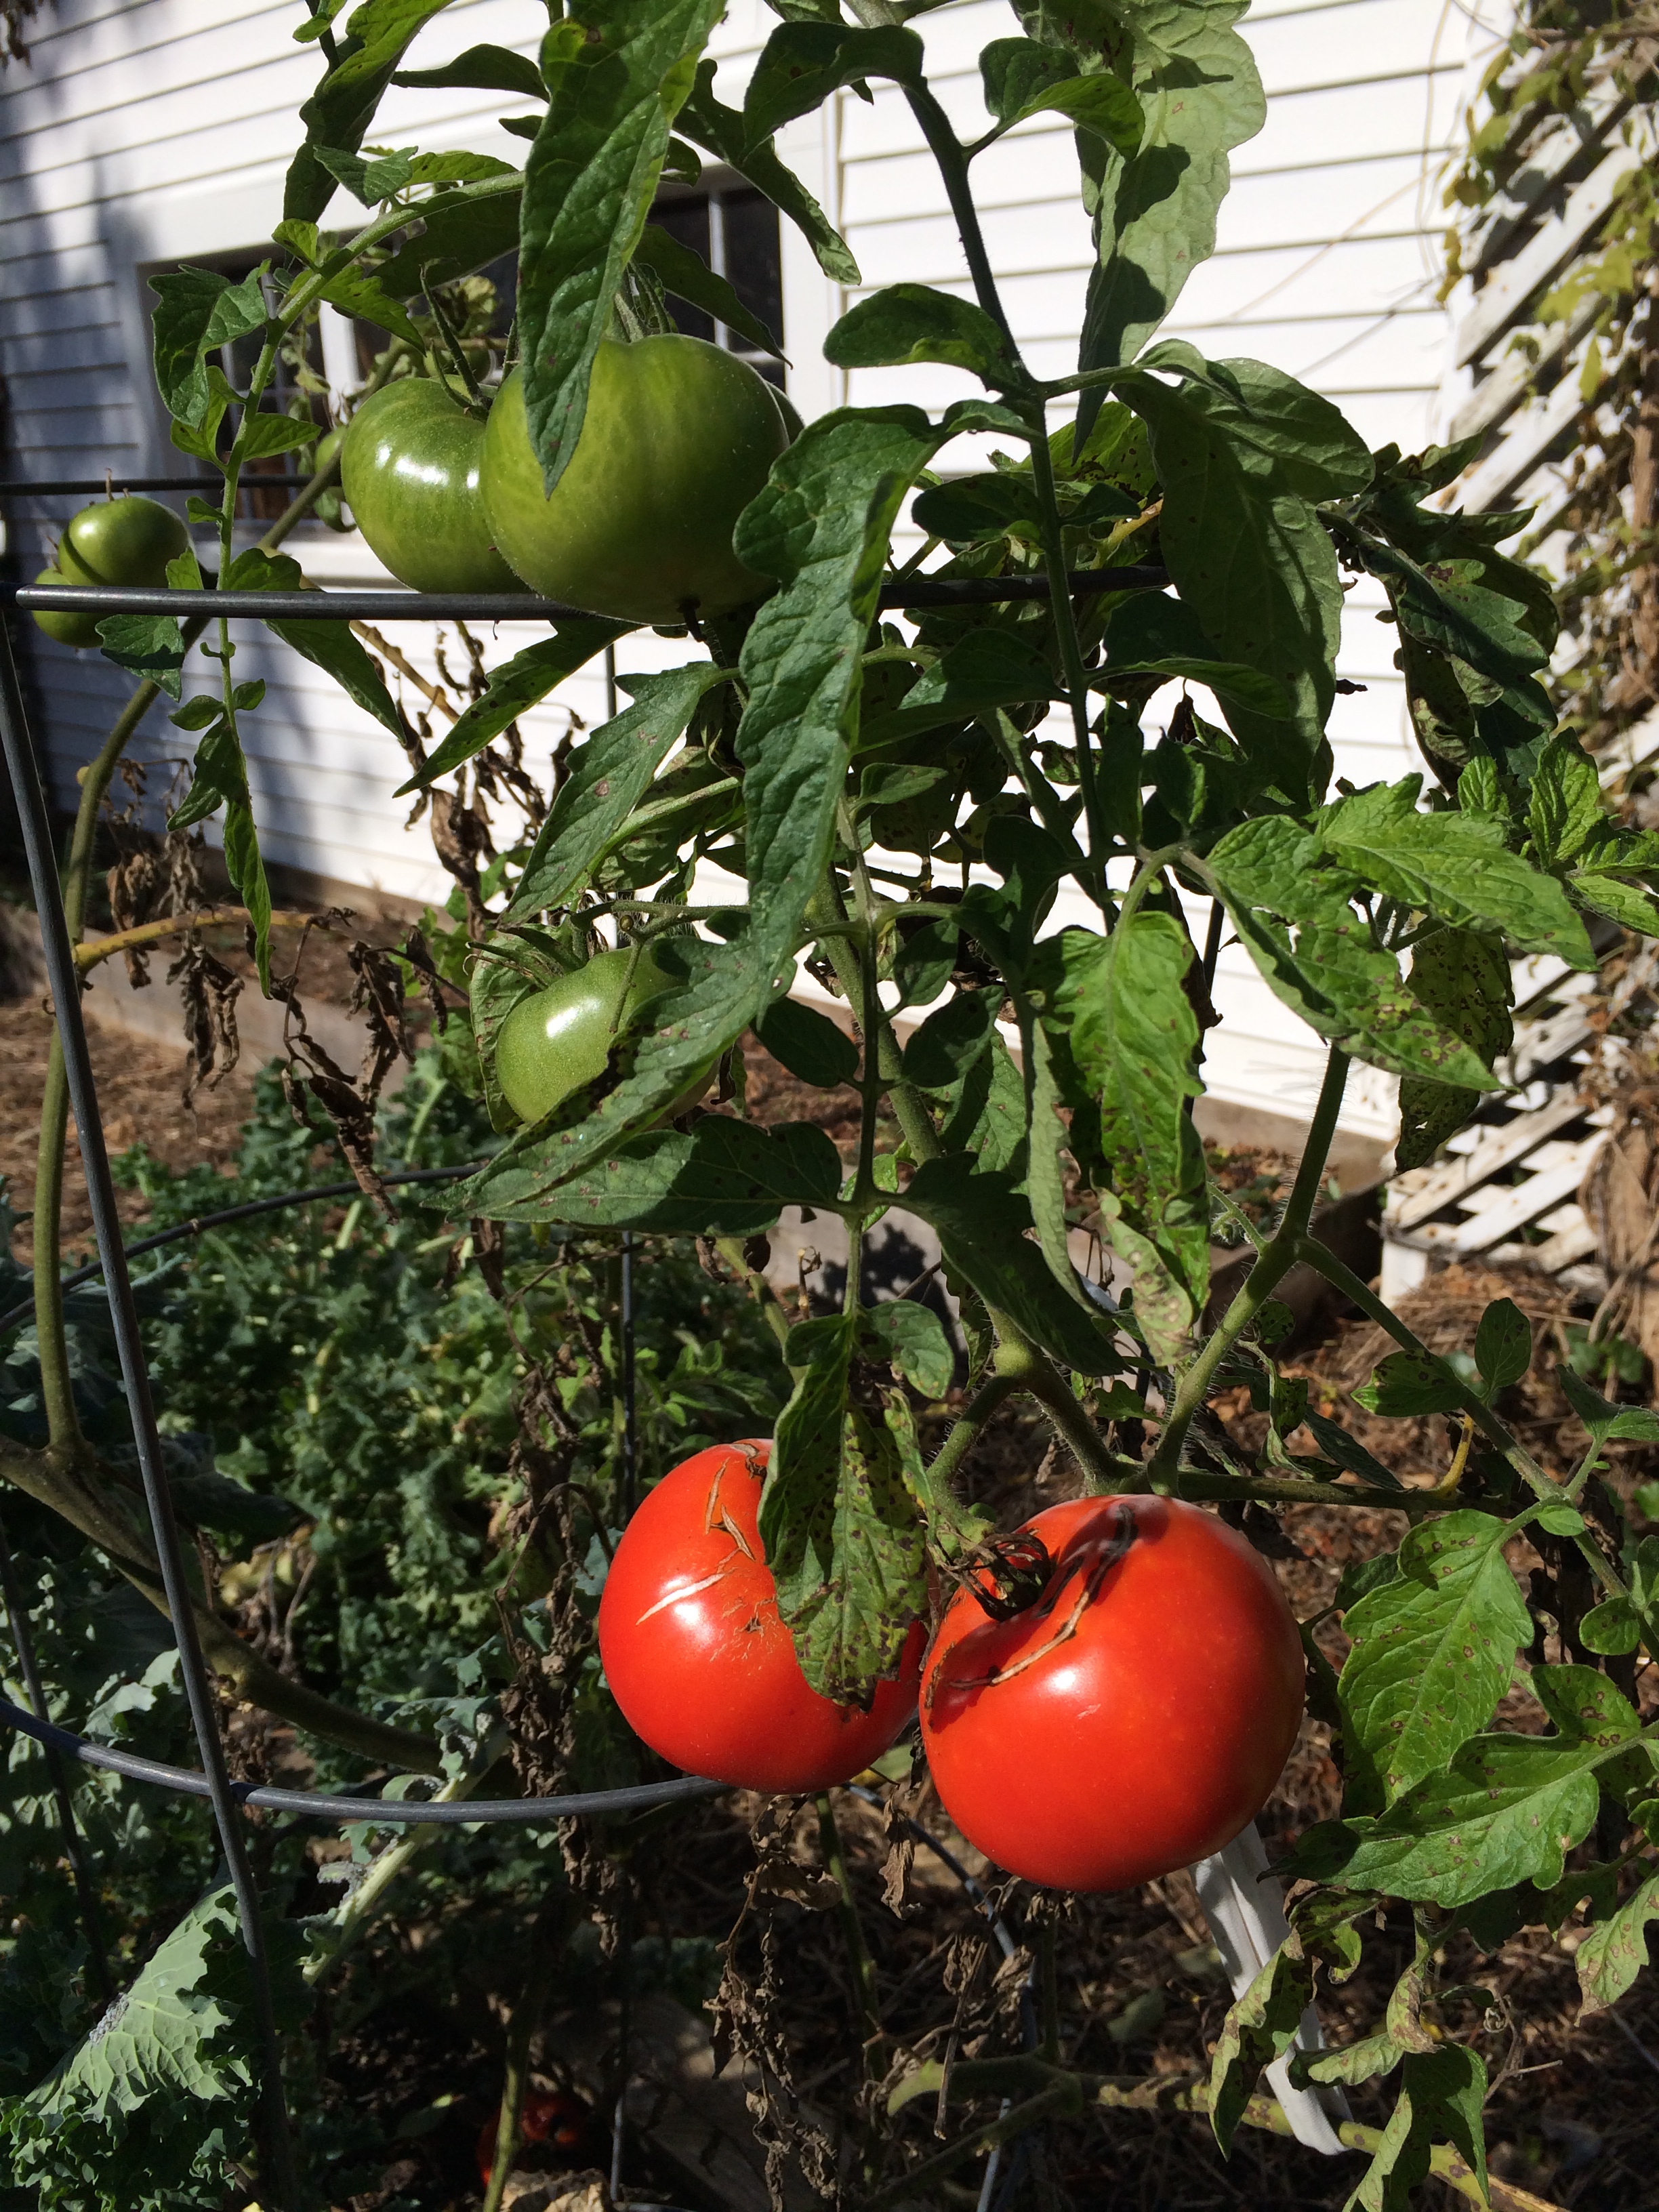
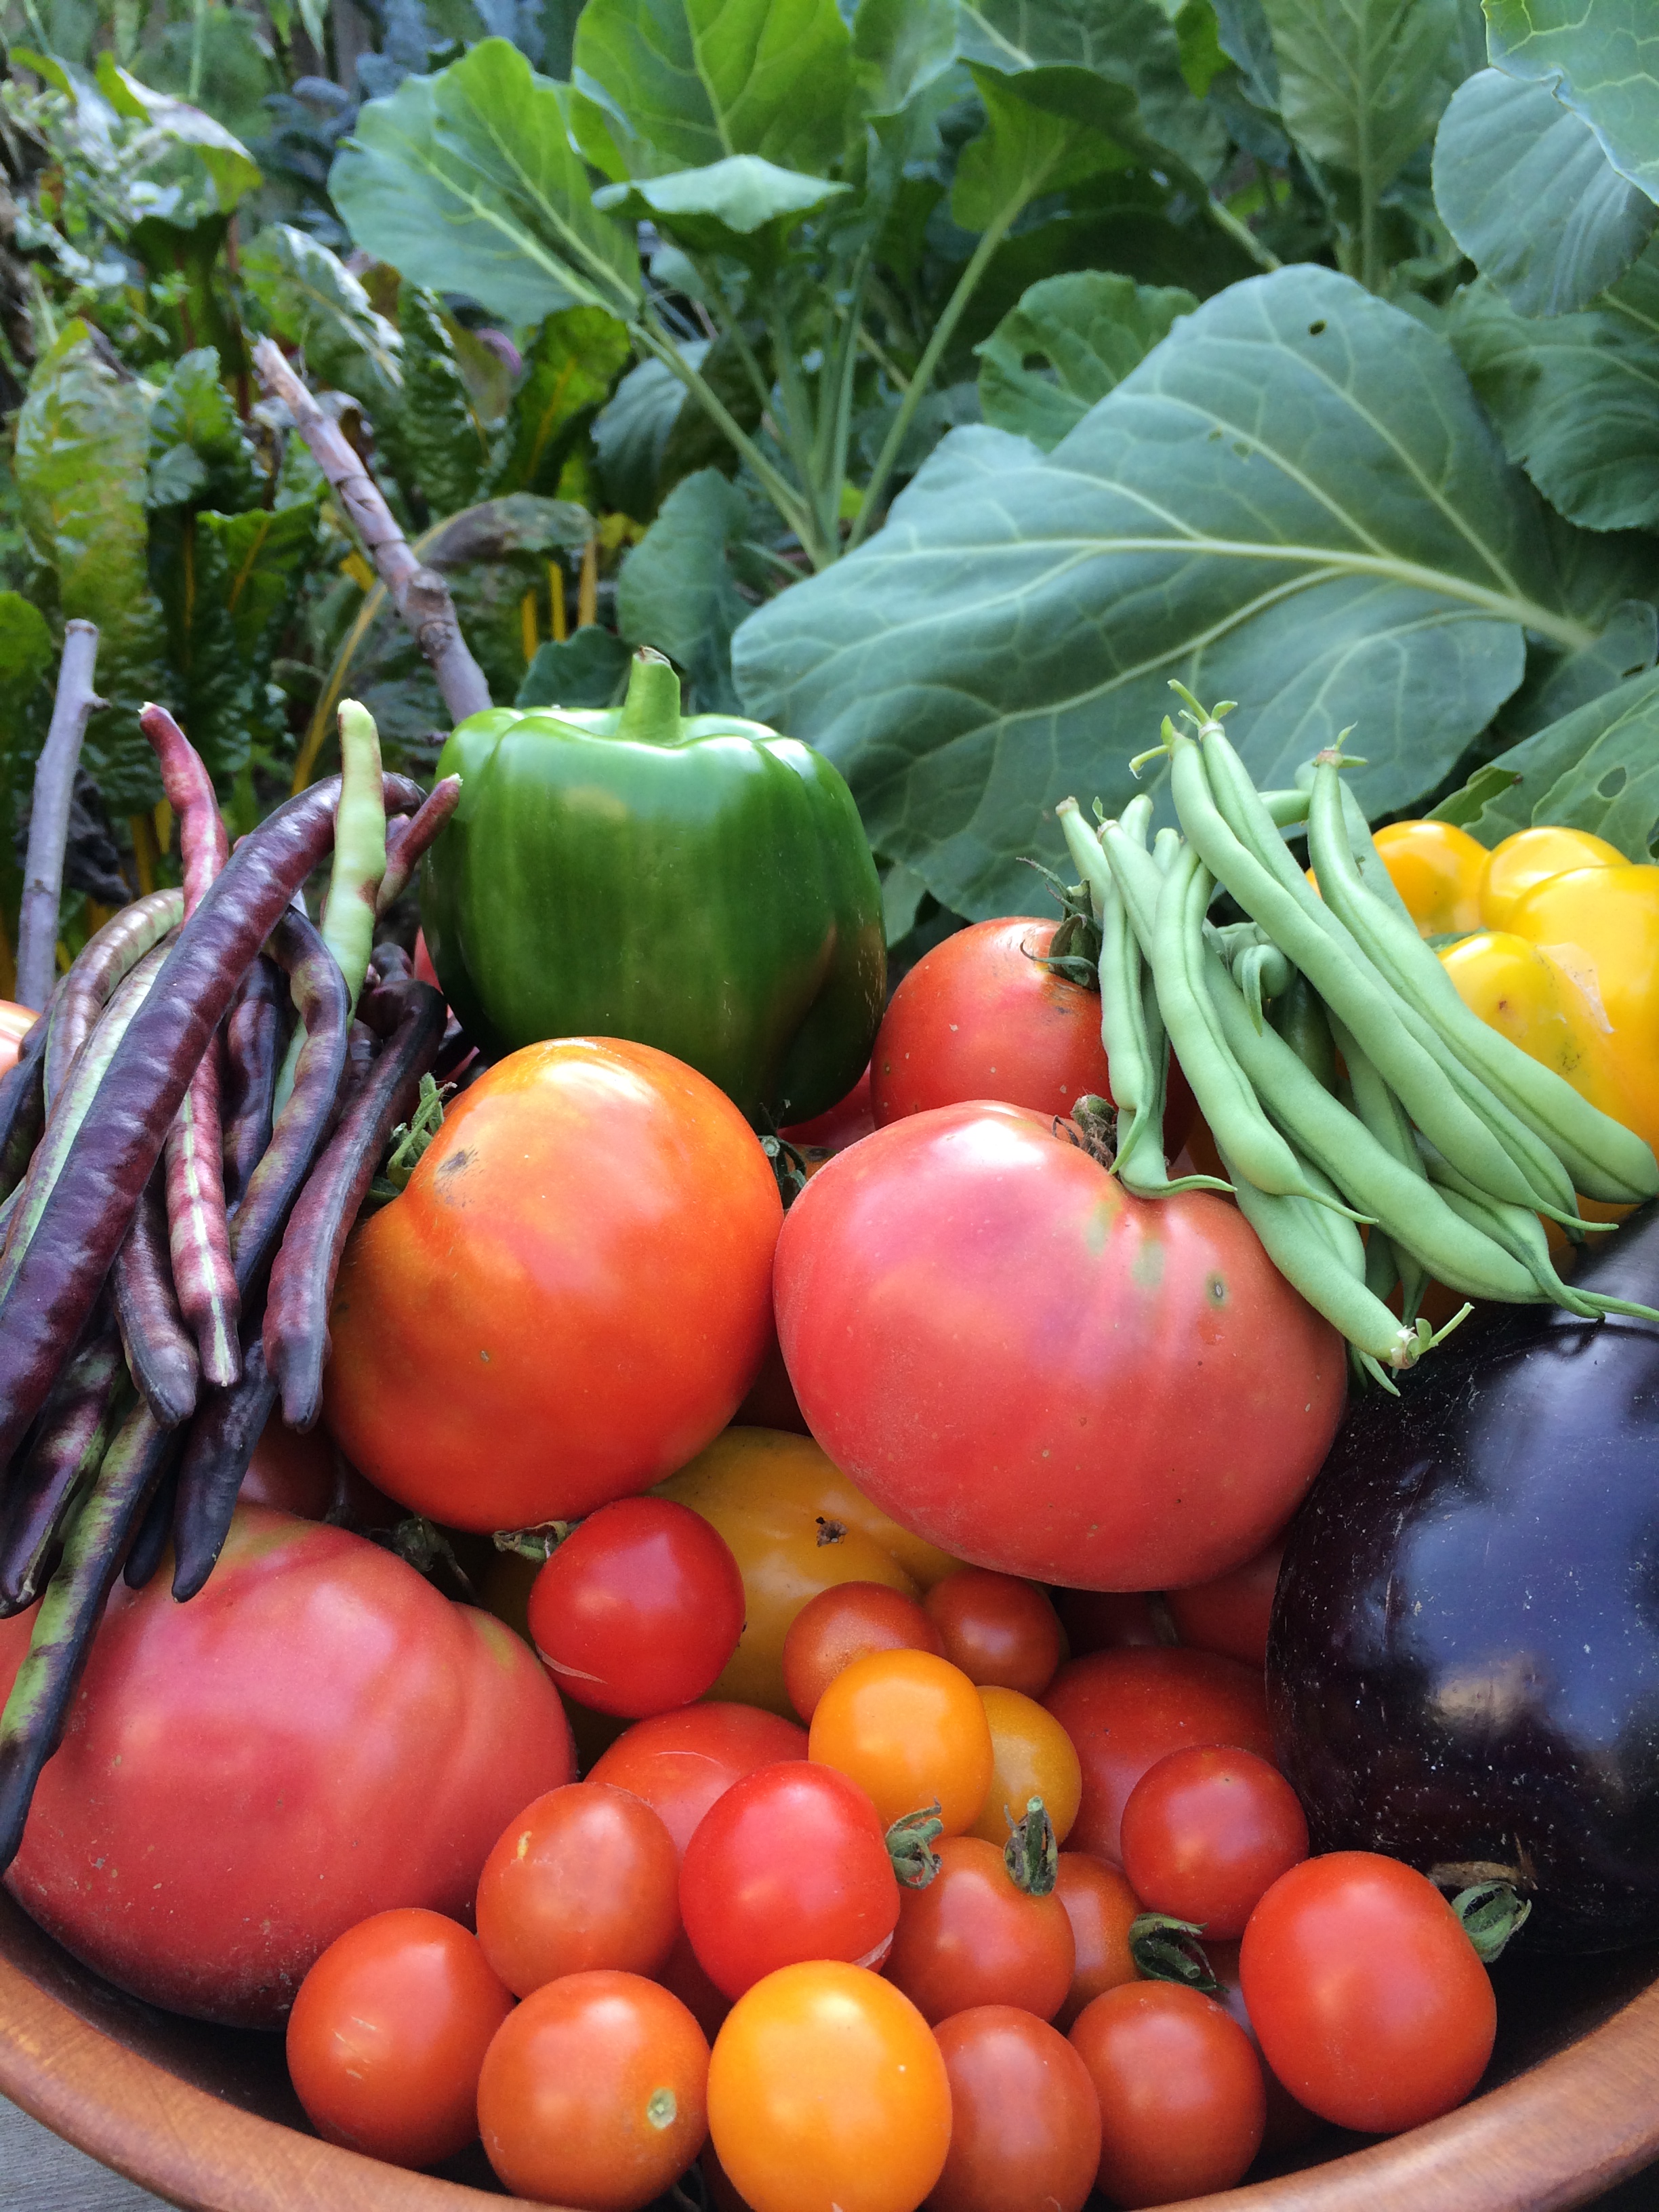
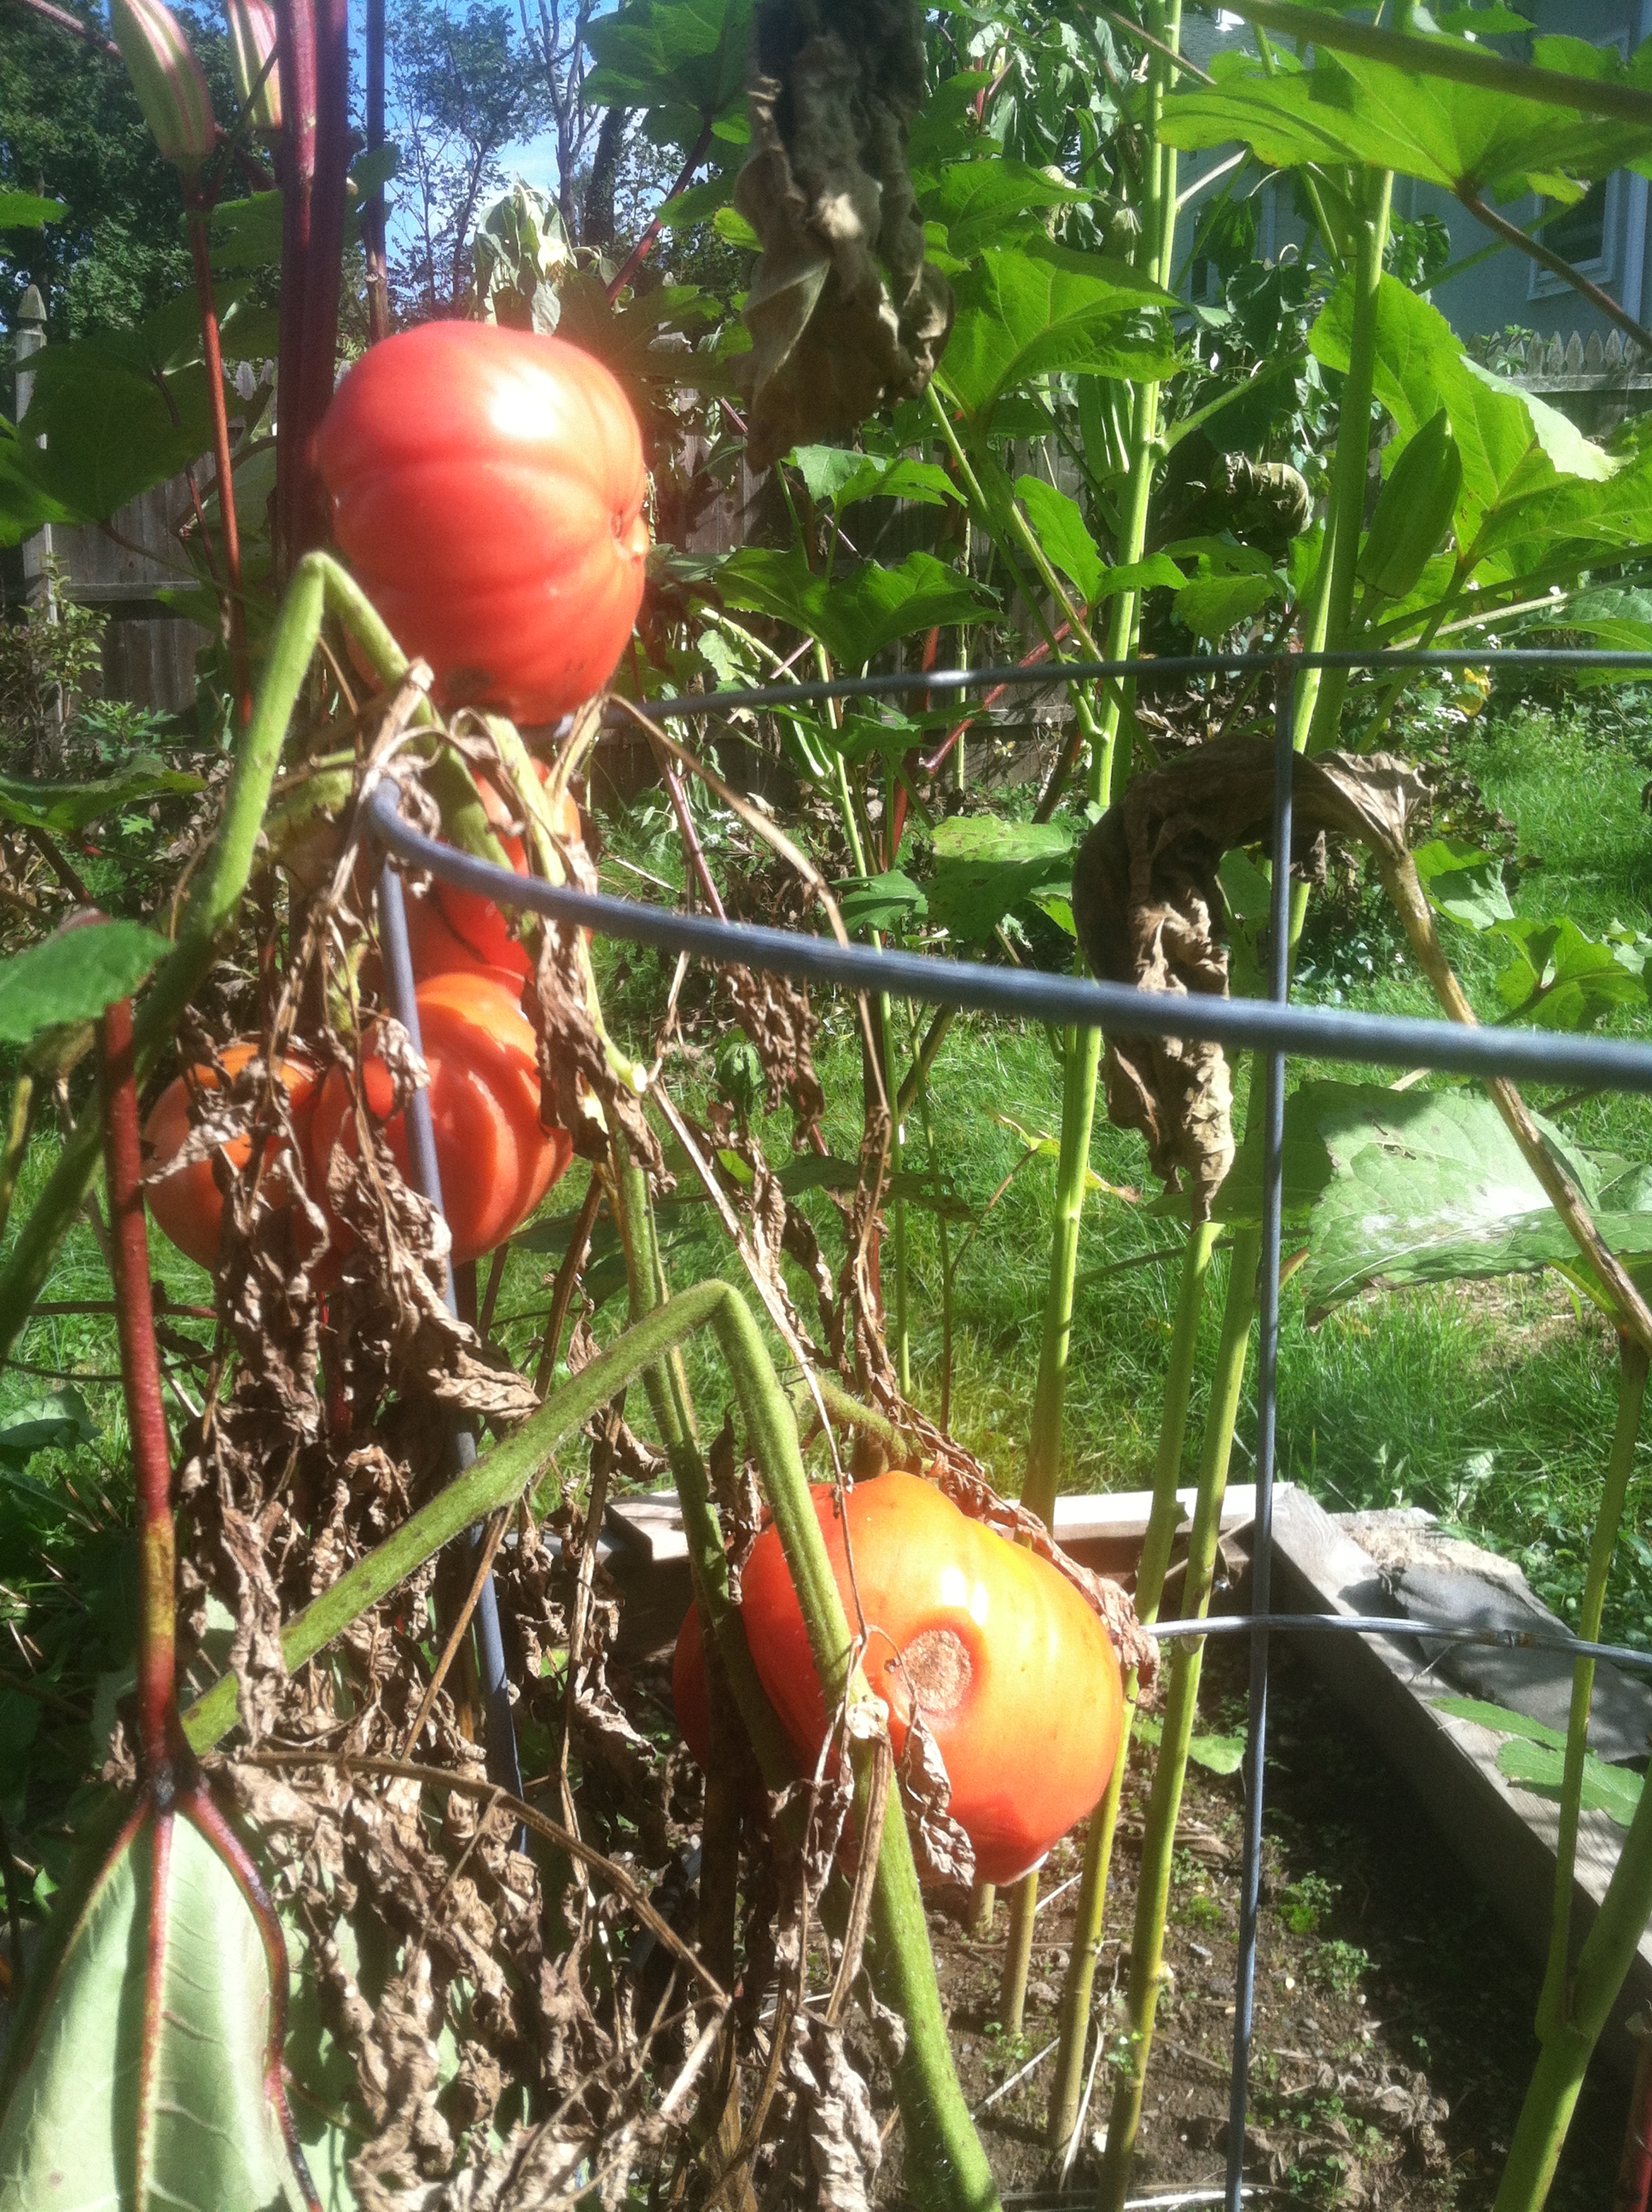
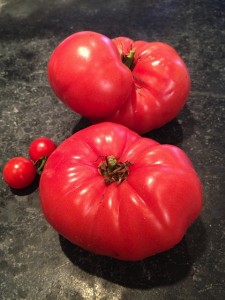
    But what about tomatoes? Apparently I was too busy eating them to take pictures. Ah, well they were still coming on strong into October. Here are a couple charmers on October 5. By October 12, the vines were looking a bit spent.

    Duo duet tomatoesTomato vines late season
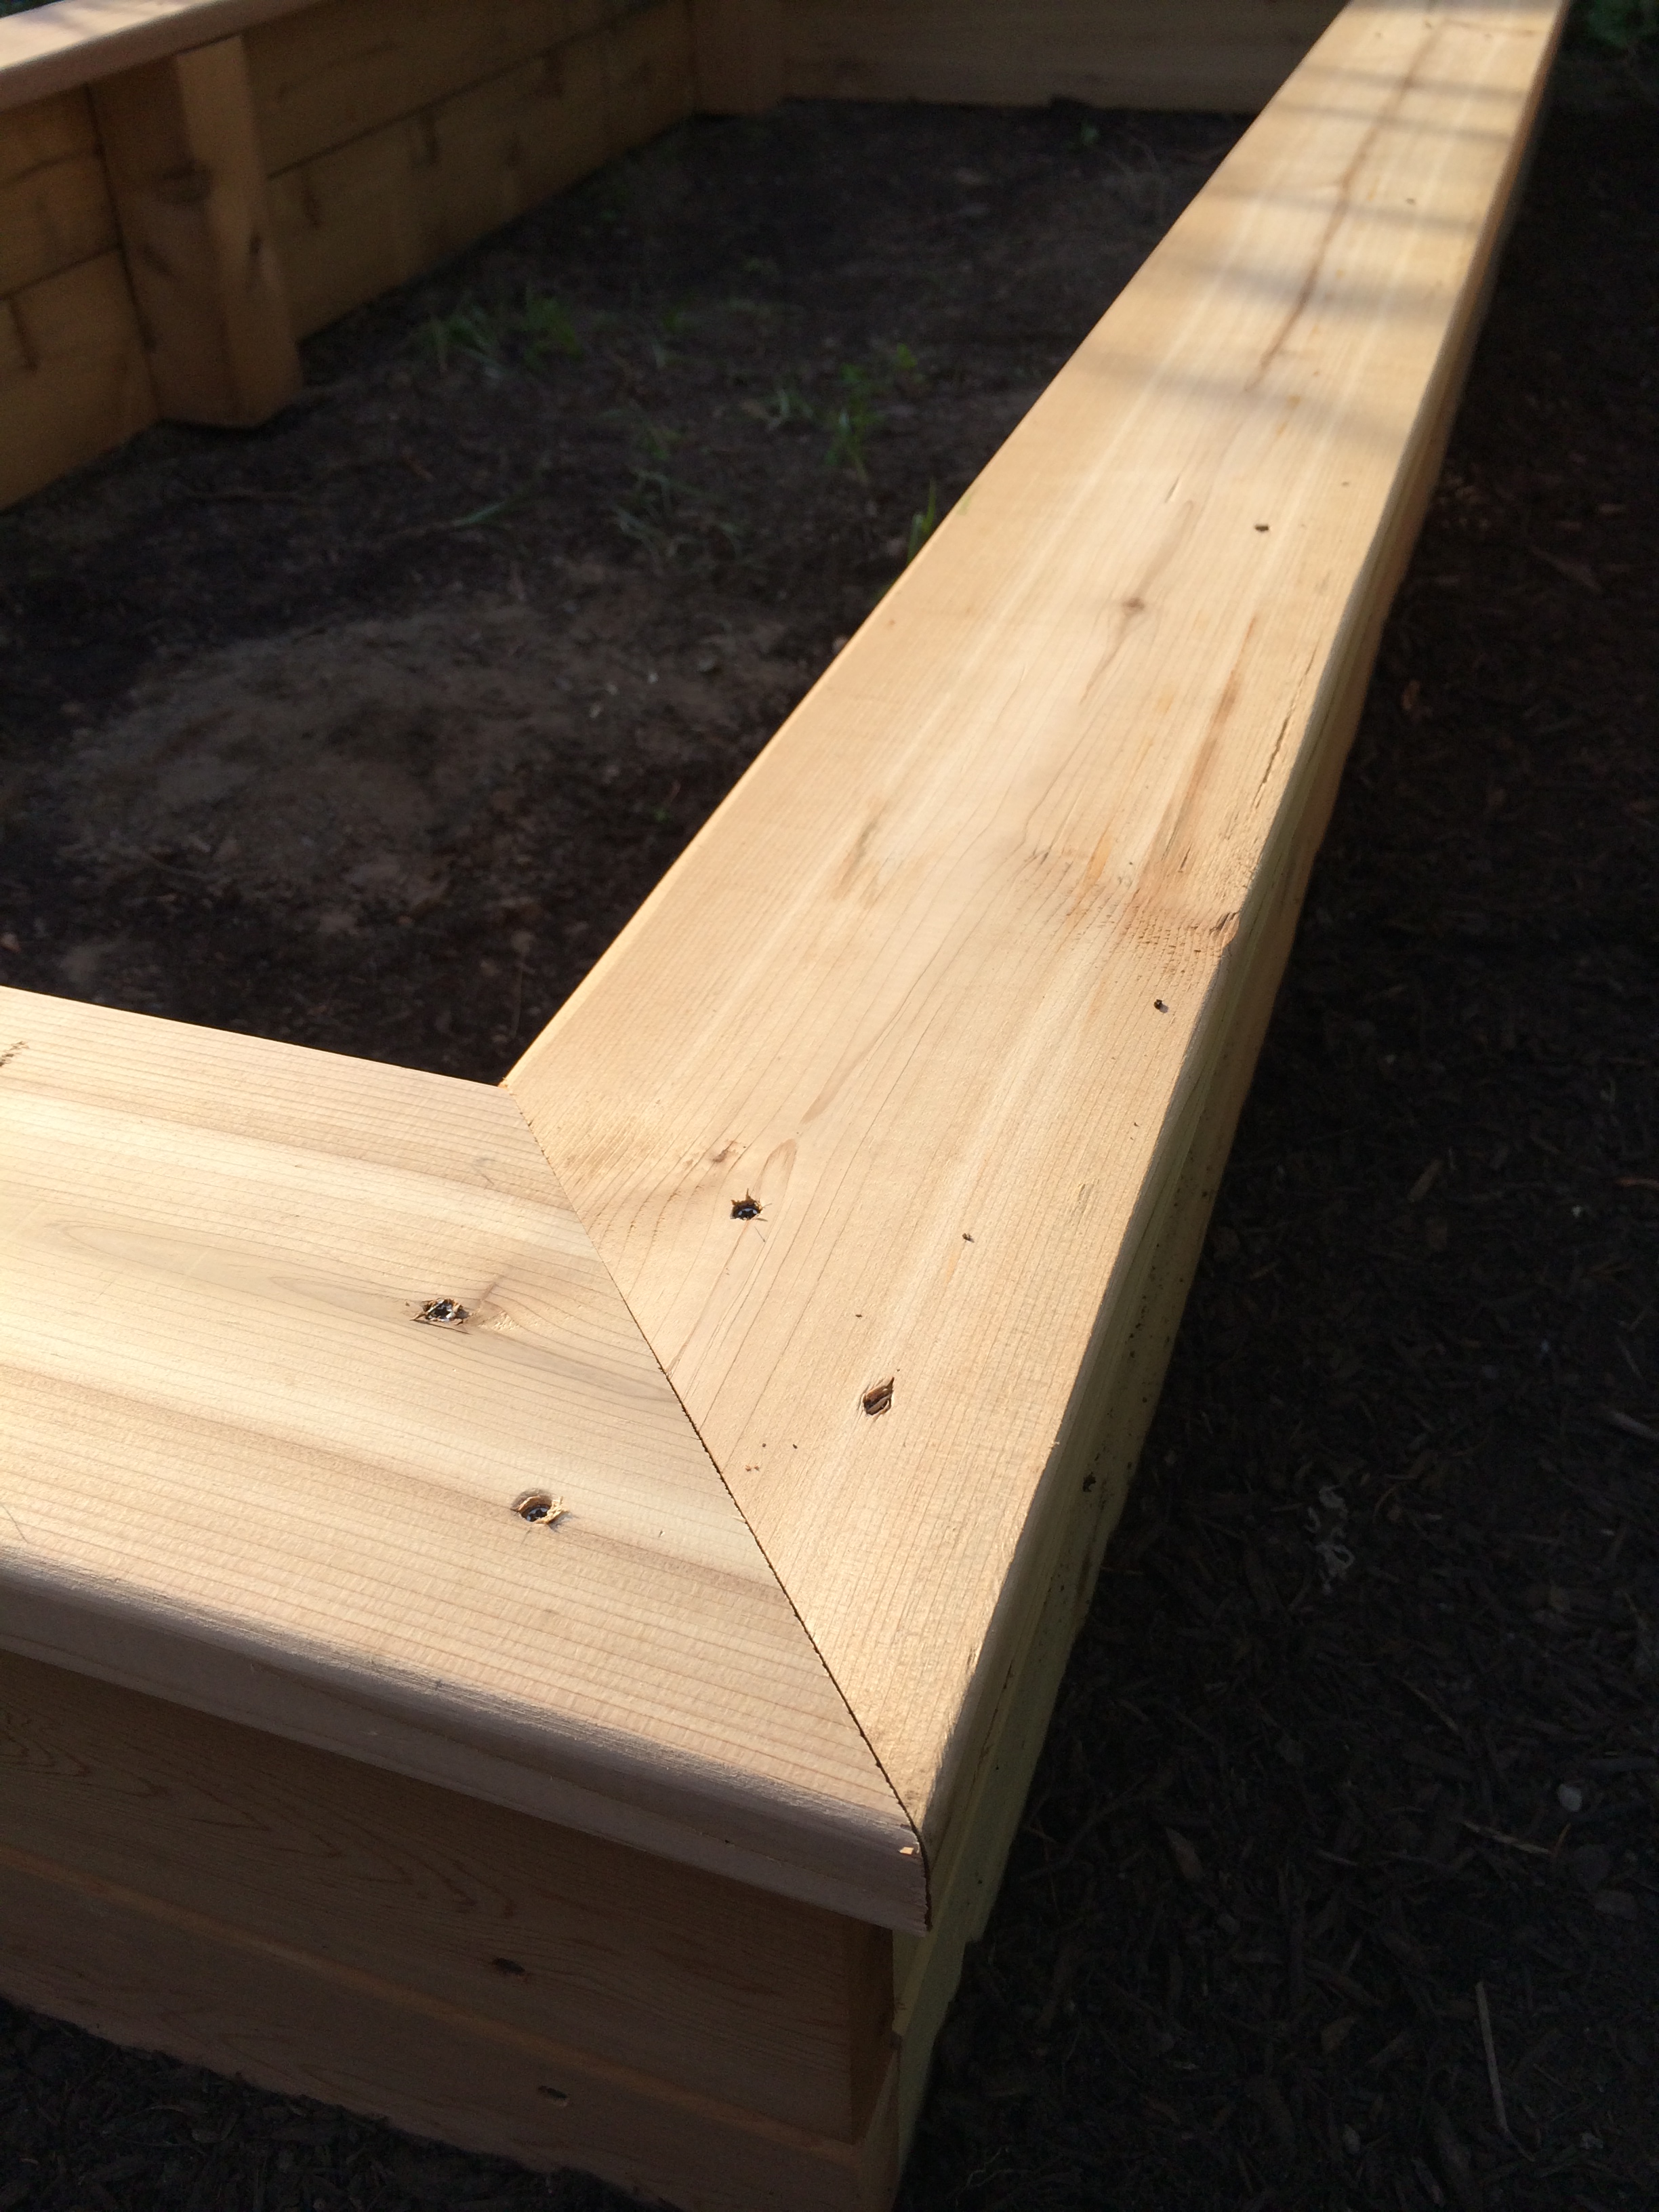
There’s no reason why the season should stop here. On this season’s ambitious list: Building an easy-to-use cold frame. Previous attempts have gone well enough to prove that lettuce can last pretty much all winter.

    Well, what are you looking forward to this year? What were your triumphs from last year?


  • Race to the top

    Peas growing
    Sugar snap peas climb strings on our trellises.

    The peas are going full tilt now, twirling themselves up the strings I provided, seemingly in a race to the top of the trellis. It’s great fun to watch, which makes the waiting easier as my family anticipates the first sugar snaps that will emerge. In the meantime, we picked a couple strawberries today; the baby lettuce planted earlier this year is yielding greens for salads and sandwiches; and the string beans are on their way, currently about 3 inches tall.

    But back to the peas: Don’t forget you can eat the shoots. When the plants are small, selectively snip off the top inch or two and put them in a salad. Or just eat them. The nearly six-year-old daughter of friends visited our garden today and ate a pea shoot. It was old hat to her because she had learned about eating them in the garden at Riverside Elementary, which is tended by garden educator Dorothy Mullen.


  • The peas have popped!

    Two rows of peas will soon be reaching up to the trellis above them.
    Two rows of peas will soon be reaching up to the trellis above them.

    The peas we planted four weeks ago (on St. Patrick’s Day) have finally popped themselves out of the ground. Now the race is on as they shoot toward the trellis above. By June, we should be eating them off the vine. And before that, if the crop looks strong, we’ll pick off some of the tender shoots and add them to salads.

    It seemed like a long time before the first one poked through but the conditions were less than ideal – hot and dry for a number of days. I watered in the early mornings and tried to be patient. Now that the peas are on the move, maybe they’ll distract me from watching the next set of seeds: We have beets, collard greens and Swiss chard in rows in front of the peas. No sign of them yet.


  • Submit your photos

    garden tool
    This tool could be yours!

    I am eager to see photos from our boxes in action, producing all sorts of great things to eat. Please send me your favorite images by April 5. I’ll gather a few gardeners to pick a favorite and then send the winner the cool garden tool on the right. I picked up one of these the other day and found it very useful for pulling up those shallow invasive ground covers that seem to colonize any piece of bare ground.

    I know it’s early for 2013 pictures, so maybe I’ll put out a request later in the season too, but feel free to send picture anytime you think of it.